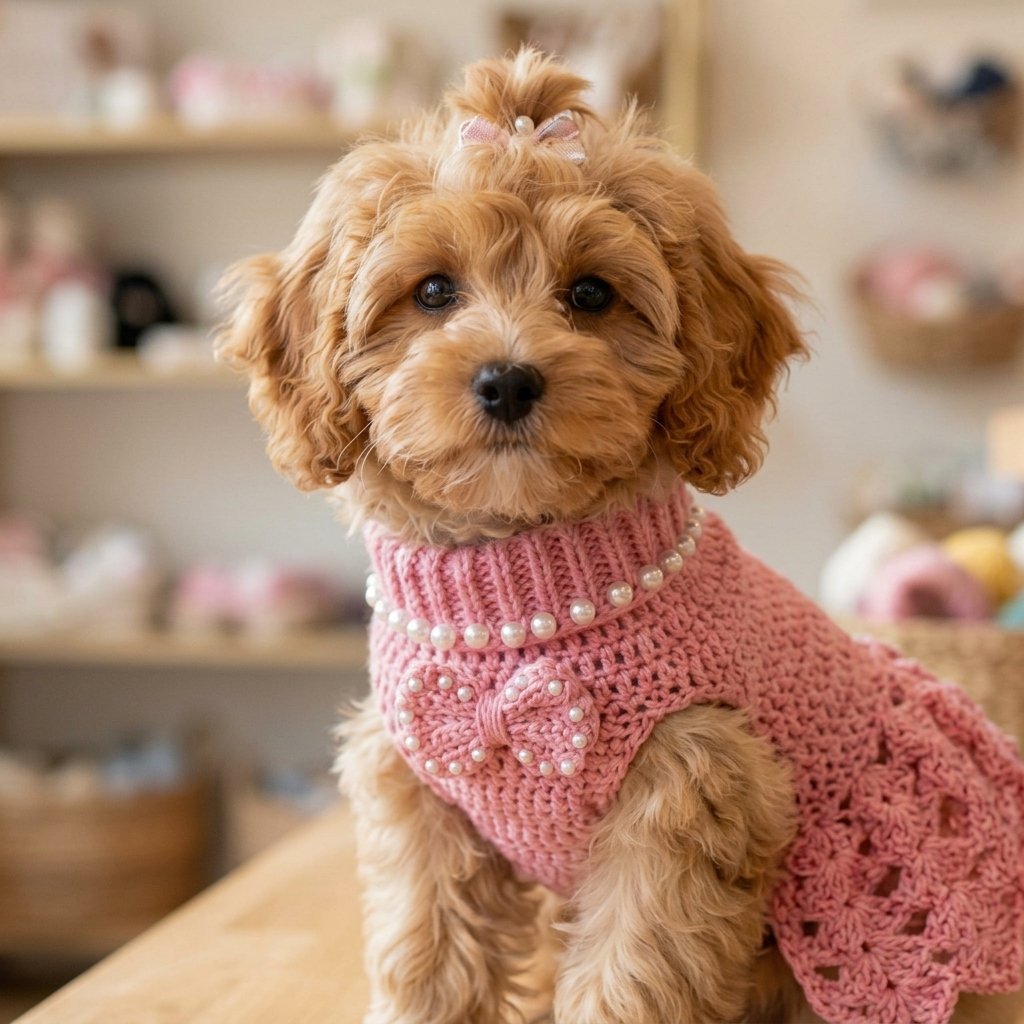
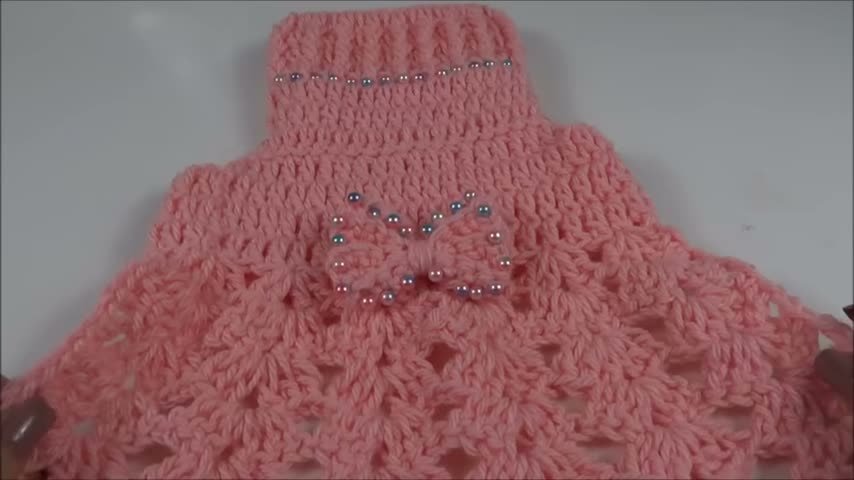
If you love dressing your furry companion in handmade knitwear, this crochet pet sweater dress is such a delightful and charming project. Designed with a snug ribbed turtleneck collar, comfortable leg openings, a full flared lace shell skirt, and finished with a pearl-beaded bow applique, this little dress keeps your pet warm while looking absolutely adorable. Below you will find the complete written pattern and the step-by-step video tutorial so you can follow along easily.
This design is worked seamlessly from the top down, starting at the neck ribbing and dividing effortlessly for the front paws before flaring into a feminine shell skirt across the back. Because the underbelly is kept trimmed and tidy, your pet stays clean and comfortable during walks. Grab your hook, choose your favourite yarn colour, and let’s get started.
Table of Contents
What Will I Learn?
In this tutorial, you will master several practical garment techniques tailored specifically for pet clothing:
- Crocheting stretchy 1×1 front-post ribbing in the round for a comfortable turtleneck collar
- Dividing stitches cleanly in flat rows to form leg openings for front paws
- Rejoining flat rows back into a circular body tube with an underbelly chain bridge
- Working a decorative flared shell lace pattern with graduated stitch counts
- Adding a crisp picot border and neat chain-loop side edging
- Creating a ribbed crochet bow applique in back loops only (BLO)
- Embellishing crochet fabric with hand-sewn pearl beading
Materials and Tools
Below is everything I used to crochet and embellish this pet dress:
- Yarn: 1 skein (100 g / approximately 218 yds / 200 m) of worsted weight acrylic yarn (#4 medium). In the tutorial, I used Círculo Mollet (100% acrylic) in shade #769 (Candy Pink / Rosinha).
- Crochet Hook: 5.0 mm (US size H-8) crochet hook.
- Pearls: 40 to 50 iridescent or faux pearls (8 mm diameter).
- Sewing Needle and Thread: Fine sewing needle and matching pink or neutral sewing thread for sewing the pearls.
- Tapestry Needle: For weaving in yarn tails.
- Scissors
Please note on yarn substitution: While I selected a soft worsted acrylic, you can easily substitute any standard worsted weight (#4) or Aran acrylic or cotton-blend yarn. Ensure the yarn is soft and machine-washable for easy pet garment care.
Sizing Guide and Adjustments
The demonstrated written pattern is written for Size Small (P), which fits small dogs and puppies weighing approximately 3.5 kg to 5.5 kg (roughly 7.5 to 12 lbs, such as small Shih Tzus, Yorkies, Maltese, Toy Poodles, and Dachshunds).
If you want to make this dress for smaller or larger pets, here is how you can easily adapt the sizing:
- Size Extra Small (PP): 2.0 kg to 3.5 kg (approx 4.5 to 7.5 lbs, e.g., Chihuahuas, tiny Yorkies):
Keep the same stitch counts but switch to a lighter weight yarn (such as DK or light worsted / Algodão Doce) with a 4.0 mm or 4.5 mm hook. The lighter yarn and smaller hook naturally reduce the finished garment dimensions. - Size Medium (M): 5.5 kg to 8.5 kg (approx 12 to 18.5 lbs, e.g., French Bulldogs, Pugs, larger Shih Tzus):
Keep the same stitch counts but switch to a slightly heavier, plush worsted or bulky yarn (such as Amiga yarn) paired with a 5.5 mm or 6.0 mm hook. - Size Large (G) and Extra Large (GG):
For larger dogs, you will need to expand the collar foundation chain (increasing in multiples of 2 to keep the ribbing balanced) and extend the body rows accordingly.
Pattern Notes and Abbreviations
This pattern is written in standard US crochet terms.
| Abbreviation | Meaning |
|---|---|
| ch | chain |
| sl st | slip stitch |
| sc | single crochet |
| dc | double crochet |
| FPdc | front post double crochet |
| BLO | back loop only |
| st(s) | stitch(es) |
| sp | space |
| rep | repeat |
Garment Construction Overview:
- Collar: Begun as a foundation ring and worked in rounds of 1×1 ribbing (alternating dc and FPdc) to form an elastic turtleneck.
- Back Panel: The circular collar transitions to flat rows across the 20 back stitches, creating side slots for the front legs.
- Underbelly Rejoin: A 32-chain bridge reconnects the flat back panel back into the round, forming the paw openings and underbelly band.
- Skirt: Worked in back-and-forth lace shells across the back panel only, flaring outward while leaving the underbelly clear.
- Edging: Finished with picots across the shell ruffle and neat sc borders along the belly edges.
- Bow & Pearls: A ribbed bow is crafted separately, edged with pearls, and sewn to the waistline.
Special Stitches
Front Post Double Crochet (FPdc)
Yarn over, insert your hook from the front of your work to the back, and then back out to the front around the vertical post of the designated stitch. Yarn over, draw up a loop, yarn over, pull through 2 loops on hook, yarn over and pull through the remaining 2 loops.
Picot Stitch
Chain 3, insert your hook into the bottom chain (or top of the previous single crochet), and slip stitch to close the decorative point.
Back Loop Only (BLO)
Instead of inserting your hook underneath both top strands of the stitch, insert your hook only under the rear strand furthest away from you. Working in BLO creates elastic, accordioned ribbing ridges.
The Written Pattern
Part 1: Ribbed Turtleneck Collar
Foundation: Chain 36. Being careful not to twist the chain, join with a slip stitch into the first chain to form a ring.
Round 1: Ch 3 (counts as first dc here and throughout). Dc into each chain around. Join with a sl st into the top of the beginning ch-3. (36 dc)
Round 2: Ch 3 (counts as dc). *FPdc around the post of the next dc, dc into the top of the next dc*; repeat from * around, ending with a FPdc around the last stitch. Join with a sl st to the top of the beginning ch-3. (36 sts: 18 dc, 18 FPdc)
Rounds 3 & 4: Ch 3 (counts as dc). *FPdc around the next FPdc, dc into the next dc*; repeat from * around, ending with a FPdc around the last st. Join with a sl st to the top of the beginning ch-3. (36 sts)
(You now have 4 rounds of collar ribbing: 1 foundation round and 3 rounds of textured 1×1 ribbing).
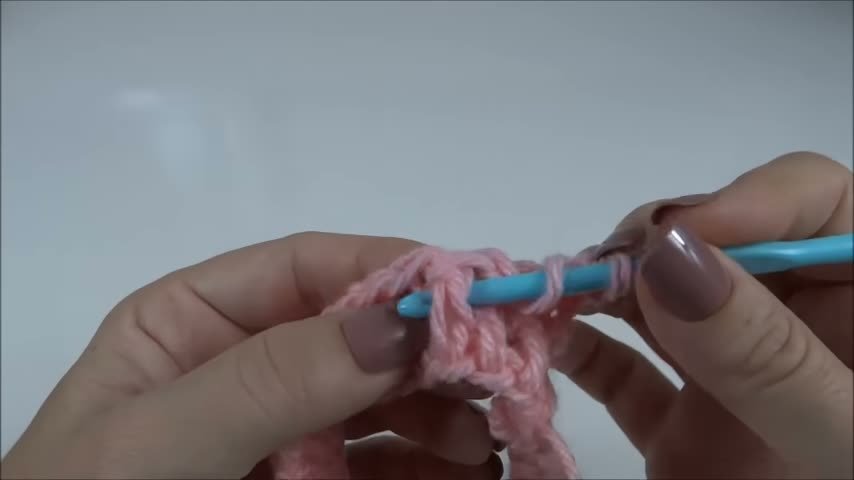
Part 2: Upper Chest & Dividing for Front Leg Openings
Round 5 (Upper Chest): Ch 3 (counts as dc). Dc into each stitch around. Join with a sl st to the top of the beginning ch-3. (36 dc)
(Now we work back and forth in flat rows across the 20 back stitches to establish the paw openings).
Row 6 (Back Panel): Ch 3 (counts as first dc). Dc into each of the next 19 stitches. Turn, leaving the remaining 16 stitches unworked. (20 dc)
Row 7: Ch 3 (counts as first dc). Dc into each of the next 19 dc across. Turn. (20 dc)
Row 8: Ch 3 (counts as first dc). Dc into each of the next 19 dc across. (20 dc)
(The 3 flat rows of 20 dc establish the side height of the front paw openings).
Part 3: Underbelly Rejoin & Lower Body
Reconnecting the Ring: At the end of Row 8, chain 32. Being careful not to twist your chain, join with a slip stitch into the top of the first double crochet on the opposite side of Row 8.
(This 32-chain bridge closes the underbelly and leaves two spacious openings on either side for your pet’s front paws).
Round 9: Ch 3 (counts as dc). Dc into each of the next 19 dc across the back panel, then work 1 dc into each of the 32 underbelly chains around. Join with a sl st into the top of the beginning ch-3. (52 dc)
Round 10: Ch 3 (counts as dc). Dc into each of the 51 stitches around. Join with a sl st into the top of the beginning ch-3. (52 dc)
Round 11: Ch 3 (counts as dc). Dc into each of the 51 stitches around. Join with a sl st into the top of the beginning ch-3. (52 dc)
(You now have a completed sweater body cylinder with two front paw holes and a fitted underbelly).
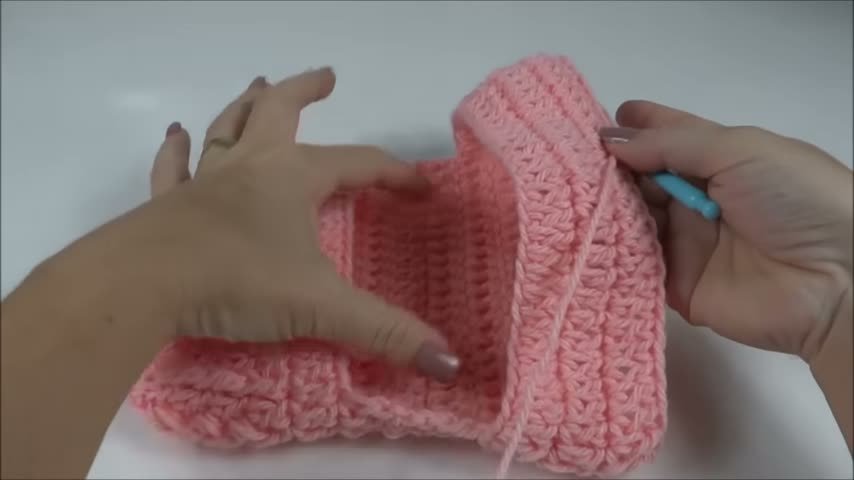
Part 4: Flared Lace Shell Skirt
(The skirt is worked in rows across the back panel only, creating a flared ruffle that drapes over the hips while keeping the underbelly completely open and practical).
Row 1: In the first stitch, work [ch 3, 1 dc, ch 2, 2 dc] (first shell completed). *Skip 3 stitches, work [2 dc, ch 2, 2 dc] into the next stitch*; repeat from * across until you have completed 6 shells across the back of the sweater. Turn, leaving the underbelly stitches unworked. (6 shells)
Row 2: Slip stitch into the 2nd dc of the first shell. Ch 3 (counts as dc), work 2 dc into the ch-2 space, ch 2, work 2 dc into the ch-2 space, 1 dc into the next dc on the opposite side of the shell (3 dc on each side of the ch-2 space). *Skip to the next shell: work 1 dc into its 2nd dc, 2 dc into the ch-2 space, ch 2, 2 dc into the ch-2 space, 1 dc into the first dc on the opposite side*; repeat from * across all 6 shells. Turn. (6 shells with 3 dc on each side)
Rows 3 to 6: Slip stitch across to the first ch-2 space. Work [ch 3, 2 dc, ch 2, 3 dc] in the ch-2 space. *In each subsequent ch-2 space across, work [3 dc, ch 2, 3 dc]*; repeat from * across all 6 shells. Turn. (6 shells per row)
Part 5: Picot Shell Edging & Hem Border
(Now we work a decorative picot edging across the skirt ruffles, followed by a continuous border down the sides and along the underbelly).
Row 7 (Picot Shell Edging): Ch 1. *Sc in each of the first 3 dc of the shell. In the ch-2 space, work [2 sc, picot (ch 3, sl st into first ch), 2 sc]. Sc into each of the next 3 dc of the shell*; repeat from * across all 6 shells.
Continuous Side & Underbelly Edging: Do not cut yarn. Rotate slightly to work down the row ends along the side of the skirt:
- Work down the side edge of the skirt: *ch 2, sc into the side of the next row* down to the unworked underbelly stitches.
- Across the underbelly: skip the first stitch, work 1 sc into each stitch across until 1 stitch remains before the opposite skirt edge, skip that last stitch.
- Work up the opposite side of the skirt: *ch 2, sc into the side of the next row* up to the start of the shell edging. Join with a slip stitch to the first sc of Row 7.
Fasten off and weave in all loose yarn ends securely on the wrong side.
Part 6: Ribbed Bow Applique
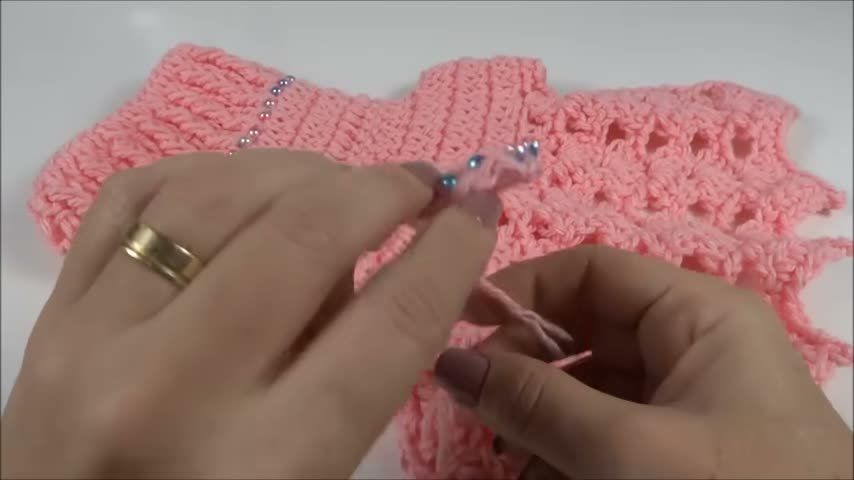
Foundation: Chain 10.
Row 1: Sc in the 2nd chain from hook and in each chain across (8 sc). Turn.
Row 2: Ch 1, working in the back loops only (BLO) across: sc in BLO of each of the 8 sc across. Turn. (8 sc)
Rows 3 to 6: Repeat Row 2 in BLO for 4 more rows (total of 6 rows in BLO, creating a neatly ribbed rectangular strip).
Cinching the Bow: Fasten off, leaving a long tail of about 8 to 10 inches (20 to 25 cm). Thread your yarn needle and bring the tail to the exact center of the rectangle. Pinch the rectangle accordion-style in the middle to create two balanced bow loops. Wrap the yarn tail firmly around the pinched center 5 to 6 times. Knot securely on the back side of the bow, keeping both tails intact for sewing.
Part 7: Pearl Embroidery & Final Assembly
- Beading the Bow: Using a fine sewing needle and matching sewing thread, sew 8 mm iridescent pearls evenly around the outer edges of both loops of the bow applique.
- Beading the Neckline: Sew a continuous line of pearls around the junction ridge where the ribbed collar (Round 4) meets the upper chest (Round 5).
- Attaching the Bow: Position the beaded bow on the center back of the dress at the waistline (the seam where the body rounds meet the lace skirt). Use the yarn tails to pull through to the wrong side of the garment, tie a firm knot, and secure with a few small stitches using your sewing thread.
Weave in any remaining threads. Your crochet pet sweater dress is ready for your furry friend to wear.
Video Tutorial
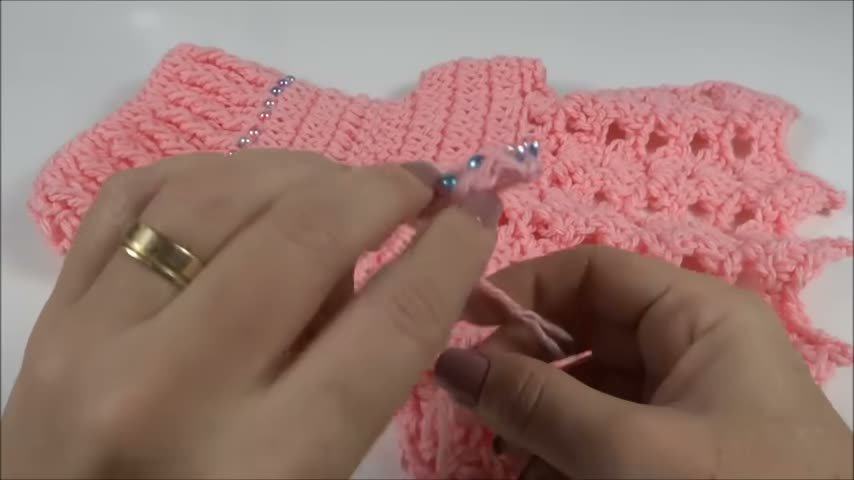
If you prefer to follow along with each round, stitch, and assembly step visually, watch the complete video tutorial below:
Tips and Common Mistakes
- Check Neck Circumference Before Continuing: After joining Round 1 of the collar, gently slip the circle over your pet’s head. It should slide on comfortably without stretching tightly over their ears or snout.
- Maintain Front Post Tension: When working FPdc in the ribbing, draw up the yarn loop to the full height of your normal double crochet before pulling through. This prevents the collar from puckering or curling inward.
- Accurate Leg Opening Placement: Working flat across the 20 back stitches leaves 16 unworked stitches for the chest. When chaining the 32 belly stitches, make sure your chain does not twist before joining.
- Keep Underbelly Clean: The skirt is specifically placed on the back 6 shells so the underbelly remains unobstructed. This ensures male and female dogs can wear the garment comfortably without soiling the fabric.
- Secure Pearls Thoroughly: Because pets may groom or play with clothing, ensure each pearl is double-stitched with strong sewing thread and tied off securely on the inside.
Make More
- Crochet hugs and kisses wave blanket —> https://crochetpattern.us/crochet-hugs-and-kisses-wave-blanket/
- Crochet Dog Sweater Pattern —> https://crochetpattern.us/crochet-dog-sweater-pattern-medium-full-tutorial/
- Crochet Dog Sweater Pattern for Large Dogs —> https://crochetpattern.us/crochet-dog-sweater-pattern/
FAQ
Can cats wear this crochet sweater dress?
Yes! Small dogs and cats have similar upper body proportions. A cat weighing between 3.5 kg and 5 kg will fit comfortably in Size Small. Make sure the neckline is loose and the leg openings allow full range of motion.
How do I wash a crochet pet garment with pearls?
Hand wash the dress in lukewarm water with mild baby detergent or wool wash. Gently press out excess water with a clean towel (do not wring or twist), reshape the skirt and bow, and lay flat to dry.
What if the neck ribbing feels too tight on my dog?
If your pet has a wider neck or broad head, add 4 or 6 chains to your initial foundation ring (increasing in multiples of 2 to preserve the 1×1 ribbing rhythm).
Can I make the skirt longer?
Yes! To make the ruffled skirt longer, simply repeat Row 3 (the [3 dc, ch 2, 3 dc] shell row) for additional rows before working the final picot edging row.
I would love to see how this adorable sweater dress looks on your precious pets. Please share your finished pictures and favourite colour combinations in the comments below. Happy crocheting, Meryem.
2 thoughts on “Crochet pet sweater dress”