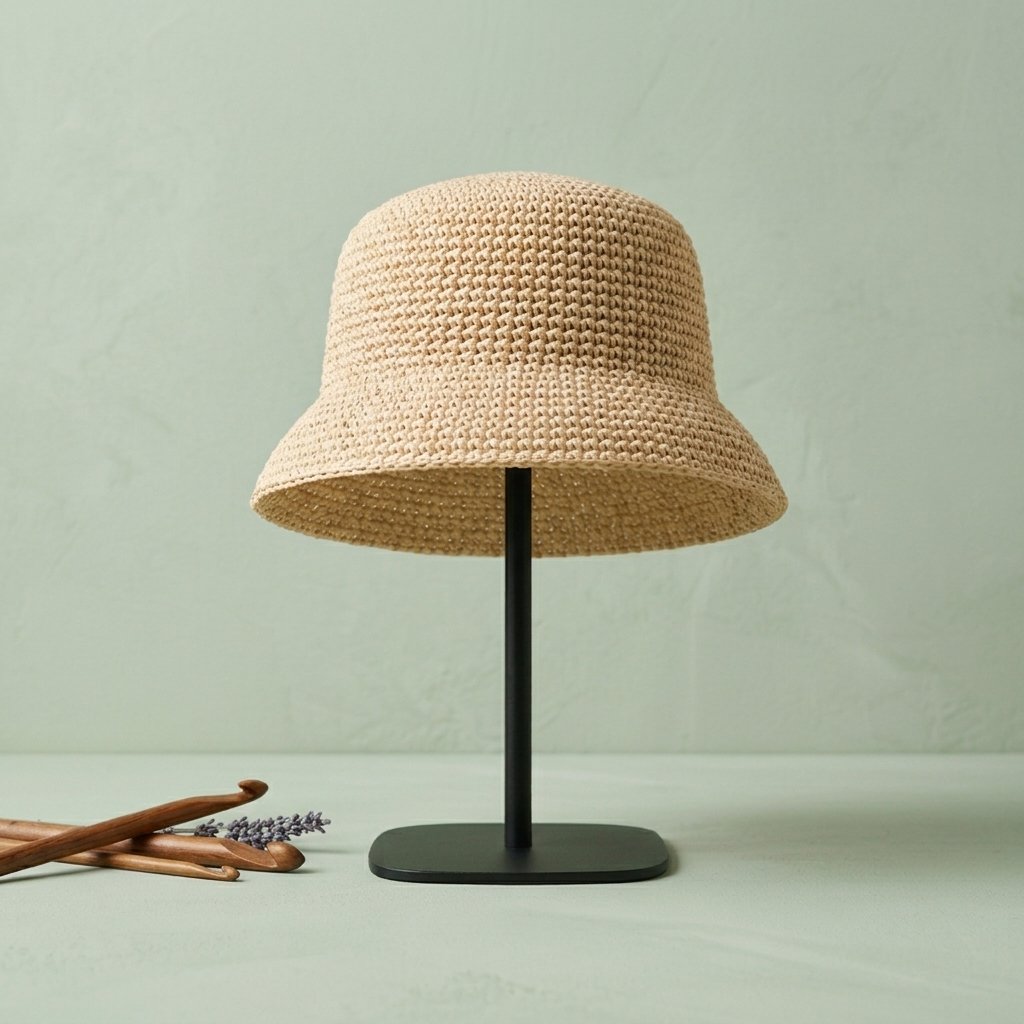
A classic raffia summer hat is one of the most stylish and practical crochet hat patterns you can make with your crochet hook. Handcrafted from lightweight, breathable plant fiber, this chic bucket hat features a flat circular crown, sleek vertical sides, and a gently angled brim that shields your face from the summer sun. Because it is worked top-down in a continuous spiral using simple single crochet stitches, you can easily customize both the circumference and the brim width to fit your exact measurements.
Working with raffia yarn gives the finished fabric wonderful natural structure, holding its crisp silhouette without needing stiff wires or heavy starching. In this comprehensive guide, I share the full written pattern, step-by-step sizing formulas, crown and brim diagrams, and shaping tips to help you create your own boutique-quality sun hat. This post is based on the video tutorial by Maylily Knitting, linked below.
Table of Contents
What Will I Learn?
By following this step-by-step tutorial, you will master essential hat-making techniques that apply to many raffia and straw accessories:
- How to work continuous spiral single crochet rounds without visible seam lines or step jumps.
- How to stagger increases across six sectors to form a perfectly round, flat circle rather than an angular hexagon.
- How to create a sharp 90-degree transition ridge between the flat crown and the vertical sides using the back loop and third loop.
- How to determine when your hat body is tall enough using simple ear-level measurement checkpoints.
- How to follow an eleven-round mathematical brim formula that expands smoothly without curling or flopping.
- How to use gentle steam blocking to relax raffia fiber and sculpt a polished finish.
Materials and Tools
Natural raffia yarns are spun from plant cellulose or rayon wood fiber, making them featherlight, water-repellent, and durable. Below are the recommended supplies for this project:
- Raffia Yarn: Approximately 80 to 100 grams of premium raffia yarn. Excellent options include:
- Eco Andaria by Hamanaka: 2 skeins (40 g = 80 m per skein, 100% rayon viscose).
- Katia Raffia X-Treme: 1 skein (100 g = 120 m, 100% organic cellulose viscose).
- ISPIE Raffia: 1 spool (100 g to 120 g needed, 100% plant cellulose fiber).
- Crochet Hook: 3.5 mm (US E/4) crochet hook. You can also use a 4.0 mm (US G/6) hook if you tend to crochet tightly, but a 3.5 mm hook provides the firmest, most stable stitch tension for paper yarn.
- Stitch Marker: A locking stitch marker or decorative charm marker to mark the first stitch of each spiral round.
- Tapestry Needle: A blunt metal yarn needle for weaving in the raffia tail seamlessly.
- Measuring Tape: To check your crown diameter and side depth.
- Household Iron / Steamer: For the final steam blocking step.
Sizing Guide for Crochet Hat Patterns: Crown Measurements
Because head sizes vary, crocheting a hat that fits comfortably requires understanding the relationship between the flat top crown and the wearer’s head circumference. In crochet hat construction, the flat crown diameter determines the overall circumference of the finished hat.
To find your ideal crown diameter, measure around the widest part of your head (just above the ears and eyebrows), subtract 2 cm (about 0.75 inches) for negative ease so the hat stays snug in the breeze, and divide that measurement by pi (3.14). The sample hat in this tutorial is worked for a standard adult medium (56 to 57 cm head circumference) with 13 crown rounds reaching 78 stitches and approximately 17 to 17.5 cm in diameter.
| Hat Size | Target Head Circumference | Target Crown Diameter | Crown Rounds (Stitches) | Side Height to Brim |
|---|---|---|---|---|
| Small / Teen | 52 cm to 54 cm (20.5″ to 21.25″) | 16 cm to 16.5 cm (6.3″ to 6.5″) | 12 rounds (72 sts) | 8 cm (3.15″) |
| Medium (Sample Size) | 55 cm to 57 cm (21.75″ to 22.5″) | 17 cm to 17.5 cm (6.7″ to 6.9″) | 13 rounds (78 sts) | 8.5 cm to 9 cm (3.35″ to 3.5″) |
| Large / Loose Fit | 58 cm to 60 cm (22.75″ to 23.5″) | 18 cm to 18.5 cm (7.1″ to 7.3″) | 14 rounds (84 sts) | 9 cm to 9.5 cm (3.5″ to 3.75″) |
Pattern Notes
- Crochet Terms: Written in standard US crochet terminology.
- Continuous Spiral: Do not join rounds with a slip stitch and do not chain 1 at the beginning of rounds. Work continuously in a spiral. Always place your stitch marker into the first stitch of every round and move it up as you work.
- Staggered Increases: To ensure the crown remains a smooth, circular disc rather than an angular hexagon, the 6 increases per round are strategically shifted between odd and even rounds.
- Handling Raffia Yarn: Avoid pulling raffia too aggressively, as excessive tension can cause paper tape yarn to fold tightly and thin out. Allow the yarn ribbon to stay relatively flat on your fingers for maximum stitch plumpness.
Terms and Abbreviations
- MR: magic ring
- sc: single crochet
- inc: increase (work 2 single crochets into the same stitch)
- BLO: back loop only
- st(s): stitch(es)
- rep: repeat
- rnd(s): round(s)
Flat Crown Pattern
Use your 3.5 mm crochet hook and chosen raffia yarn. Begin with a magic ring.
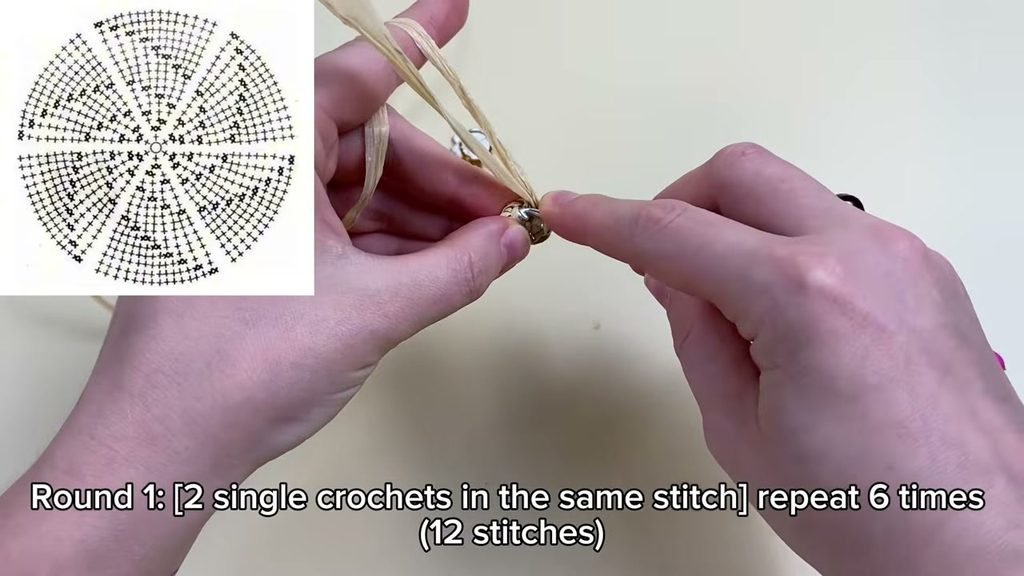
Foundation and Rounds 1 to 3
Foundation: Make a magic ring.
Round 1: Work 6 sc into the magic ring. Pull the tail gently to close the center hole, leaving it slightly relaxed so the paper yarn does not snap. Place your marker in the first stitch. (6 sts).
Round 2: Work 2 sc into each of the 6 stitches around. (12 sts).
Round 3: [1 sc in next st, inc in next st] repeat 6 times. (18 sts).
Staggered Increase Rounds (Rounds 4 to 13)
To keep the circle round, we stagger the increases on even rounds so the corners never stack on top of each other:
Round 4: [1 sc, inc, 1 sc] repeat 6 times. (24 sts).
Round 5: [3 sc, inc] repeat 6 times. (30 sts).
Round 6: [2 sc, inc, 2 sc] repeat 6 times. (36 sts).
Round 7: [5 sc, inc] repeat 6 times. (42 sts).
Round 8: [3 sc, inc, 3 sc] repeat 6 times. (48 sts).
Round 9: [7 sc, inc] repeat 6 times. (54 sts).
Round 10: [4 sc, inc, 4 sc] repeat 6 times. (60 sts).
Round 11: [9 sc, inc] repeat 6 times. (66 sts).
Round 12: [5 sc, inc, 5 sc] repeat 6 times. (72 sts).
Round 13: [11 sc, inc] repeat 6 times. (78 sts).
After completing Round 13, lay your circle flat on a table. It should measure between 17 cm and 17.5 cm across. If you need a smaller hat, stop after Round 12 (72 sts). If you need a larger fit, work Round 14 as [6 sc, inc, 6 sc] repeat 6 times (84 sts).
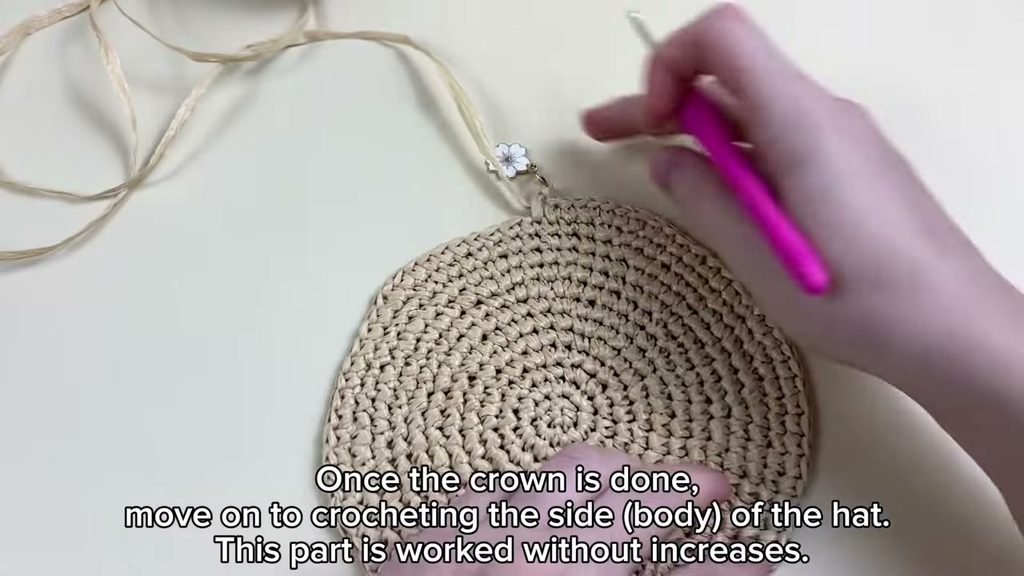
Hat Side (Body) Pattern
Now that the top disc is complete, we transition to the vertical walls of the bucket hat. The side section is worked completely even without any increases.
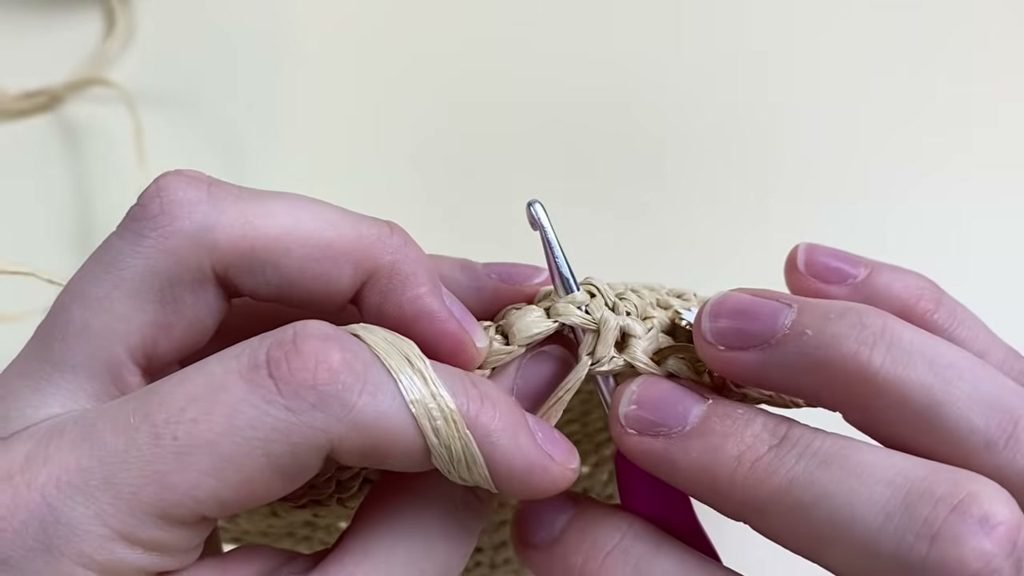
Side Round 1 (Crease Transition)
Side Round 1: To create a crisp right-angle bend that separates the flat top from the side wall, work 1 sc into the back loop and the third loop (the small horizontal bar directly behind the back loop) of each stitch around. This pushes the unworked front loop to the exterior, forming a clean defining ridge. Do not work any increases. (78 sts).
Side Rounds 2 to 19 (Vertical Wall)
Side Rounds 2 to 19: Starting from the second round, return to standard crocheting by inserting your hook under both loops of each stitch. Work 1 sc into every stitch around in a continuous spiral, keeping your marker in the first stitch of each round. (78 sts per round).
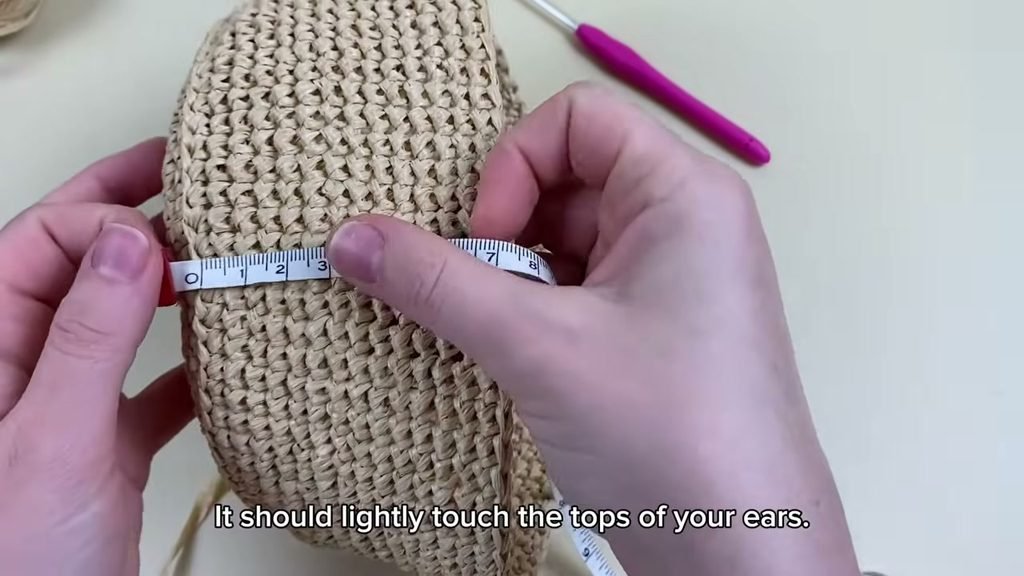
Continue working even rounds until the side wall measures approximately 8.5 cm to 9 cm (about 3.35 to 3.5 inches) from the transition crease. A reliable way to test your progress is to try the hat on: the bottom edge of the side wall should rest right at the top of your ears. If you prefer a deeper bucket fit, add 1 or 2 more rounds before beginning the brim.
Flared Brim Pattern
The brim is designed to flare outward at a flattering angle while retaining enough stiffness to prevent drooping over your eyes. We achieve this with an eleven-round sequence where ten rounds incorporate six evenly spaced increases, followed by one final stabilizing round worked plain.
Brim Rounds 1 to 11
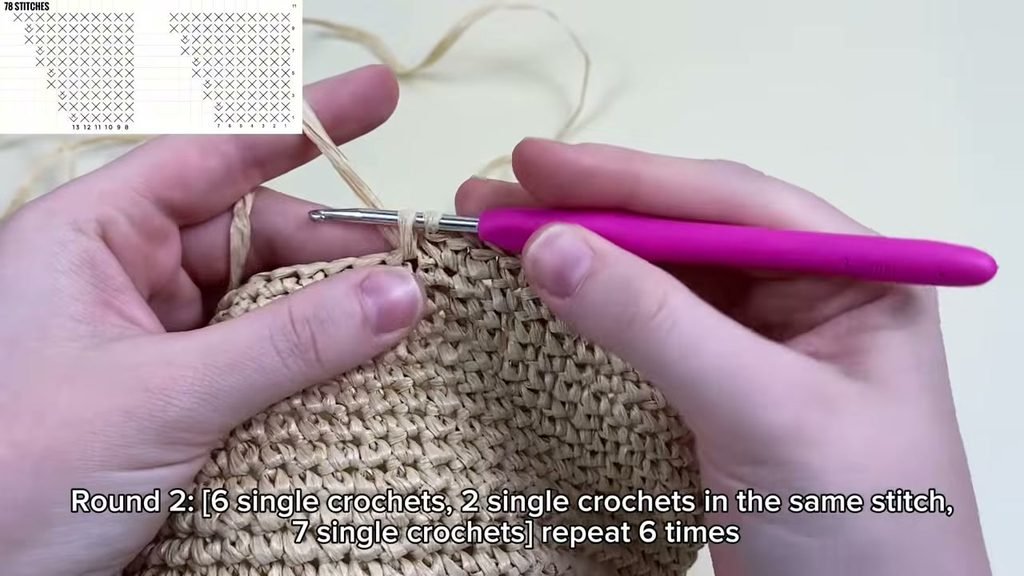
Every repeat is worked 6 times around the circumference, starting from our baseline of 78 stitches:
Brim Round 1: [12 sc, inc in next st] repeat 6 times. (84 sts).
Brim Round 2: [6 sc, inc in next st, 7 sc] repeat 6 times. (90 sts).
Brim Round 3: [14 sc, inc in next st] repeat 6 times. (96 sts).
Brim Round 4: [7 sc, inc in next st, 8 sc] repeat 6 times. (102 sts).
Brim Round 5: [16 sc, inc in next st] repeat 6 times. (108 sts).
Brim Round 6: [8 sc, inc in next st, 9 sc] repeat 6 times. (114 sts).
Brim Round 7: [18 sc, inc in next st] repeat 6 times. (120 sts).
Brim Round 8: [9 sc, inc in next st, 10 sc] repeat 6 times. (126 sts).
Brim Round 9: [20 sc, inc in next st] repeat 6 times. (132 sts).
Brim Round 10: [10 sc, inc in next st, 11 sc] repeat 6 times. (138 sts).
Brim Round 11 (Final Stabilizing Round): Work 1 sc into each stitch around without any increases. (138 sts).
To finish the final round, slip stitch into the next stitch. Cut the raffia yarn leaving a 15 cm (6 inch) tail. Thread the tail onto your blunt metal tapestry needle and weave it cleanly through the back of several stitches along the inner rim to secure it invisibly.
Steam Blocking and Finishing
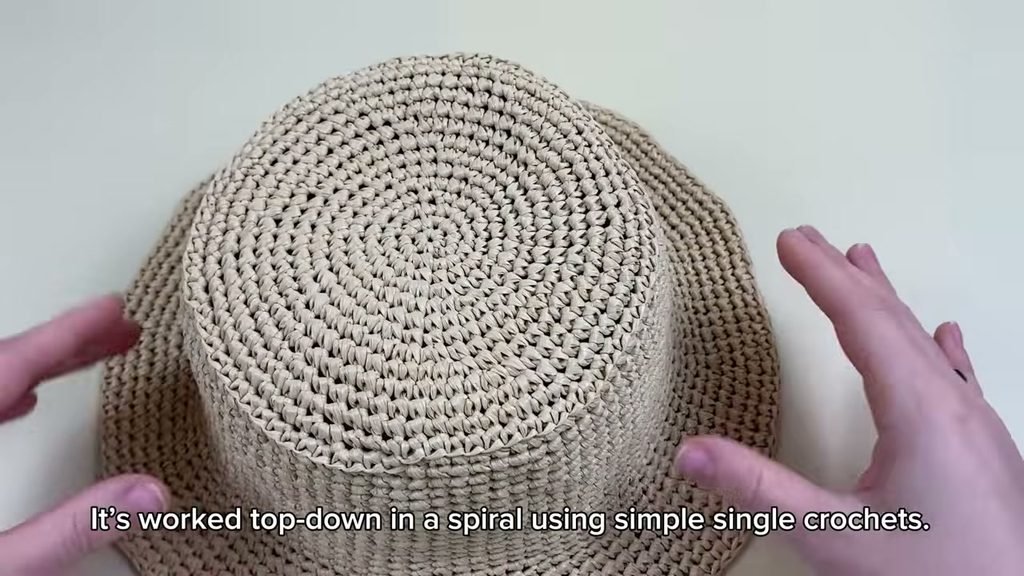
Raffia responds miraculously to steam heat. Because paper ribbon fiber has natural memory, steam blocking softens the creases, evens out stitch tension, and sets a permanent, professional shape:
- Place your hat over a round form, such as an upside-down ceramic mixing bowl, a tailor’s ham, or a hat mannequin stand.
- Hold a steam iron or garment steamer approximately 2 to 3 cm away from the hat surface. Never touch the hot iron directly to the raffia, as synthetic viscose fibers can scorch or melt.
- Apply generous bursts of steam across the flat top crown and around the side walls. Smooth and press the fabric gently with your clean hands or a rolled towel to train the right-angle crease.
- Steam the brim evenly from underneath and along the top face. Rest the brim flat on your ironing board to ensure an even, elegant flare.
- Allow the hat to dry and cool completely on the form for 30 minutes. Once dry, the raffia will be crisp, firm, and ready to wear.
Written Pattern Summary Table
| Hat Section | Round Range | Stitch Count | Key Technique |
|---|---|---|---|
| Crown: Center | Rounds 1 to 3 | 6 sts to 18 sts | Magic ring base with 6-point increases |
| Crown: Expansion | Rounds 4 to 13 | 24 sts to 78 sts | Staggered increases; reach 17 to 17.5 cm diameter |
| Side: Crease Transition | Side Round 1 | 78 sts | 1 sc in BLO and third loop around (no inc) |
| Side: Vertical Body | Side Rounds 2 to 19 | 78 sts | 1 sc in both loops around to 8.5-9 cm depth |
| Brim: Expansion | Brim Rounds 1 to 10 | 84 sts to 138 sts | Alternating end and middle increases (+6 sts/rnd) |
| Brim: Edge Finish | Brim Round 11 | 138 sts | 1 sc in each st around (worked even without inc) |
Video Tutorial
Watch each round demonstrated in real time with helpful on-screen diagrams in the official video tutorial: Crochet the “Summer” Raffia Hat | Full Beginner-Friendly Tutorial by Maylily Knitting.
Tips and Common Mistakes
- Use a Smooth Metal Hook: Raffia has higher surface friction than wool or cotton. An ergonomic hook with a polished aluminum or steel tip glides through raffia stitches much more smoothly than wooden or bamboo hooks.
- Do Not Over-Tighten: Tugging hard on paper yarn will cause the ribbon to crush into a narrow cord, leading to stiff stitches and finger strain. Maintain a light, consistent hand.
- Mark Every Single Round: Because spiral crochet has no seam lines, it is very easy to lose track of where your rounds begin and end. Move your marker up with every completed round.
- Customizing Brim Width: If you want a shorter, bucket-style brim, you can stop after Brim Round 7 or 8. If you want a wide sun hat brim, continue the alternating increase formula for several additional rounds before working your final plain round.
- Packability and Care: If your hat gets crushed inside a travel suitcase, you can easily reshape it back to perfection with a 2-minute blast of steam from an iron or hotel shower.
Make More / Related Patterns
Ready to make more warm-weather accessories? Explore more free crochet hat patterns and summer projects from our library:
Crochet Stitches for Beginners —> https://crochetpattern.us/crochet-stitches-for-beginners/
- Santa Granny Square –> https://crochetpattern.us/crochet-santa-granny-square/
- pet sweater dress —> https://crochetpattern.us/crochet-pet-sweater-dress/
Frequently Asked Questions
Is raffia yarn waterproof?
High-quality rayon viscose raffia (like Eco Andaria) and plant cellulose raffia (like Ispie) can handle light water splashes and humid beach air. If the hat gets wet, simply reshape it by hand and let it dry flat. Avoid fully submerging or machine washing raffia items.
Can I make this hat using cotton yarn instead?
Yes, you can substitute worsted weight cotton or linen yarn. Keep in mind that cotton has less natural stiffness than raffia, resulting in a softer, more slouchy bucket hat rather than a structured summer hat.
Why is my hat crown bubbling or ruffling?
If your crown ripples like a potato chip, your stitches are too loose for the number of increases. Try switching to a smaller hook (such as 3.0 mm or 3.25 mm) or check that you are strictly adding only 6 increases per round.
How do I join a new ball of raffia?
To join a new skein, lay the new strand alongside the working strand for about 3 stitches and crochet over both strands together, then drop the old tail. Weave the remaining ends into the wrong side later.
I would love to see your finished summer hats, so please share your photos and tell me which raffia yarn you chose in the comments below. Happy crocheting, Meryem!
One thought on “Crochet Hat Patterns: Free Raffia Summer Bucket Hat”