When the holidays approach, my crochet hooks are usually working overtime making gifts for family, friends, neighbors, and coworkers. If you find yourself needing dozens of festive ornaments in a hurry, this very fast origami folded crochet Christmas tree is the absolute best pattern to keep in your holiday repertoire. It takes less than twenty minutes from start to finish, uses only a handful of basic double crochets, and requires no complicated shaping or seam sewing.
The magic behind this design lies in its clever construction. Rather than crocheting multiple separate cones or working in tiny fiddly rounds, you crochet a simple five-row flat semi-circle fan. Then, you edge the curved border with a delicate snowy white contrast trim, and fold it using an intuitive accordion fold into a charming three-dimensional tiered Christmas tree. Adorned with a ribbon bow, tiny pearls, or a sparkling star button, it turns simple stitches into an elegant holiday keepsake.

Table of Contents
Materials and Tools Needed
You can make several of these little trees from a single skein of yarn or clear out small leftover scraps from your stash.
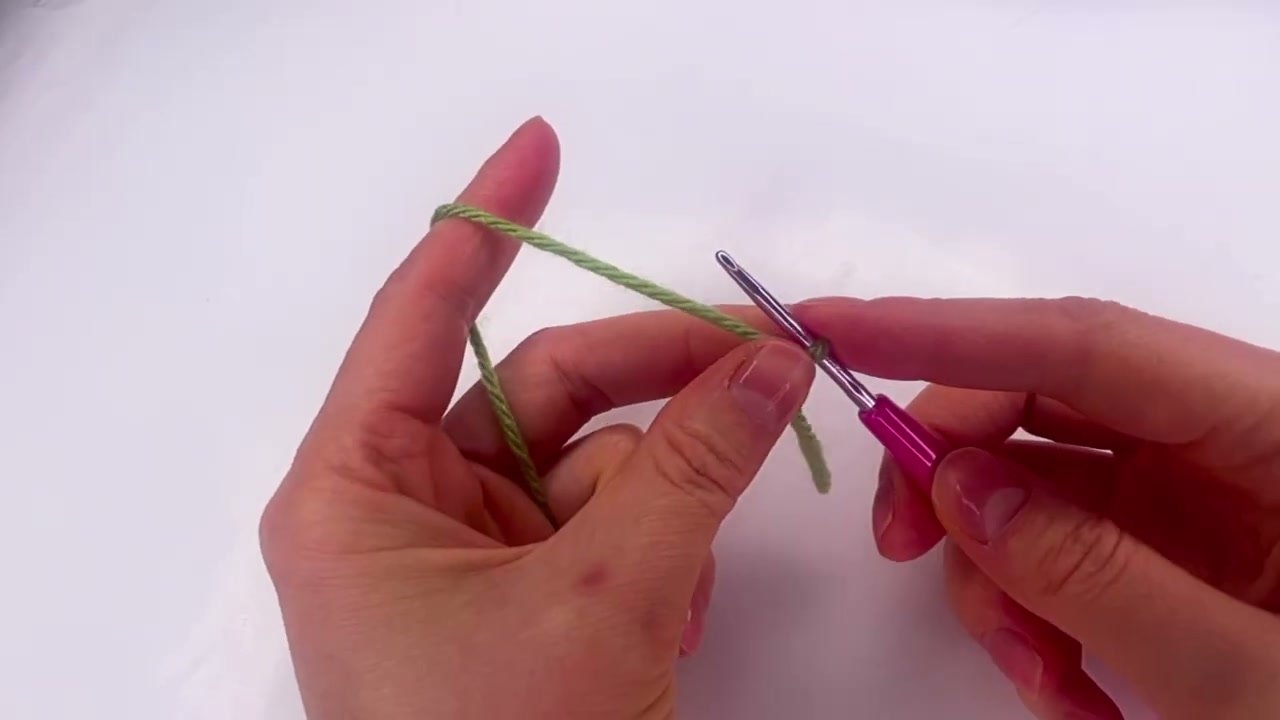
- Yarn: DK weight or light worsted weight yarn in traditional evergreen, forest green, or mint. A small amount of contrast yarn in snow white, cream, or metallic gold for the decorative edging.
- Crochet Hook: 3.0 mm (US size C-2 or D-3). A slightly compact hook keeps your double crochets firm so the folded pleats hold their crisp shape.
- Yarn Needle: Blunt tapestry needle for weaving ends and catching the back pleats.
- Scissors: For cutting yarn ends cleanly.
- Embellishments (Optional): Tiny craft pearl beads, miniature red satin ribbon bows, wooden star buttons, or hot glue.
Pattern Notes and Construction Overview
Here are a few quick tips to help you get the cleanest results:
- Skill Level: Beginner friendly. The entire project consists of chains, double crochets, and slip stitches.
- Turning Chain Count: The starting chain-3 at the beginning of each row counts as the first double crochet stitch throughout this pattern.
- Increasing Evenly: In each row, we add 8 double crochets evenly across the curve to keep the semi-circle completely flat without curling or ruffling before folding.
- Tension Tip: Maintain steady, even tension. If your stitches are too tight, the fabric will feel stiff; if they are too loose, the pleats may feel floppy when folded.
Stitch Abbreviations (US Terms)
- ch: chain
- dc: double crochet
- sl st: slip stitch
- st(s): stitch(es)
- [ … ]: instructions within brackets indicate repeating sequences
Step-by-Step Written Pattern: 5-Row Tree Fan
We work back and forth in five simple rows to create the semi-circular base fabric for the tree.

Row 1: Foundation Fan
Start with a slip knot on your hook and chain 4. Yarn over, insert your hook into the fourth chain from the hook (the very first chain you made), and work 1 double crochet. Continue working into that same first chain space to make 6 more double crochets. Your beginning chain-3 counts as 1 double crochet, giving you a total of 8 double crochets in your starting semi-circle fan. (Total: 8 dc)
Row 2: First Increase Row
Ch 3 and turn your work. Yarn over and work 1 double crochet into the very first stitch (at the base of the chain-3). Work 2 double crochets into each remaining stitch across the row, ending with 2 double crochets in the top of the turning chain-3 from Row 1. (Total: 16 dc)
Row 3: Second Increase Row
Ch 3 and turn. Work 1 double crochet into the first stitch. Work 1 double crochet in the next stitch. Repeat the increase sequence across: [2 dc in next stitch, 1 dc in next stitch] across the entire curve. End with 1 double crochet in the top of the turning chain. (Total: 24 dc)
Row 4: Third Increase Row
Ch 3 and turn. Work 1 double crochet into the first stitch. Work 1 double crochet in each of the next 2 stitches. Repeat the sequence across: [2 dc in next stitch, 1 dc in each of next 2 stitches] across the row. End with 1 double crochet in the final turning chain. (Total: 32 dc)

Row 5: Final Body Row
Ch 3 and turn. Work 1 double crochet into the first stitch. Work 1 double crochet in each of the next 3 stitches. Repeat the sequence: [2 dc in next stitch, 1 dc in each of next 3 stitches] across the curve. End with 1 double crochet in the top of the previous row turning chain. Chain 1, fasten off your main green yarn, and weave in your loose ends. (Total: 40 dc)
Crocheting the Contrast Snowy Edging
Adding a snowy textured border around the bottom curve gives our tree instant holiday charm and highlights each layer when folded.

- Make a slip knot with your contrast white or cream yarn.
- Join your yarn with a slip stitch into the first stitch of Row 5 on the curved perimeter (into the third chain of the turning chain).
- Ch 2, then slip stitch into the next stitch.
- Repeat the edging sequence: [ch 2, slip stitch into the next stitch] in every stitch across the entire curved outer edge.
- In the very last stitch, work your final slip stitch, chain 1, and cut your yarn leaving a small tail. Weave in both ends cleanly on the back side of your work.
The Origami Folding Technique (Two Methods)
Now comes the fun part: shaping your flat fan into a dimensional Christmas tree! There are two beautiful ways you can fold this piece.
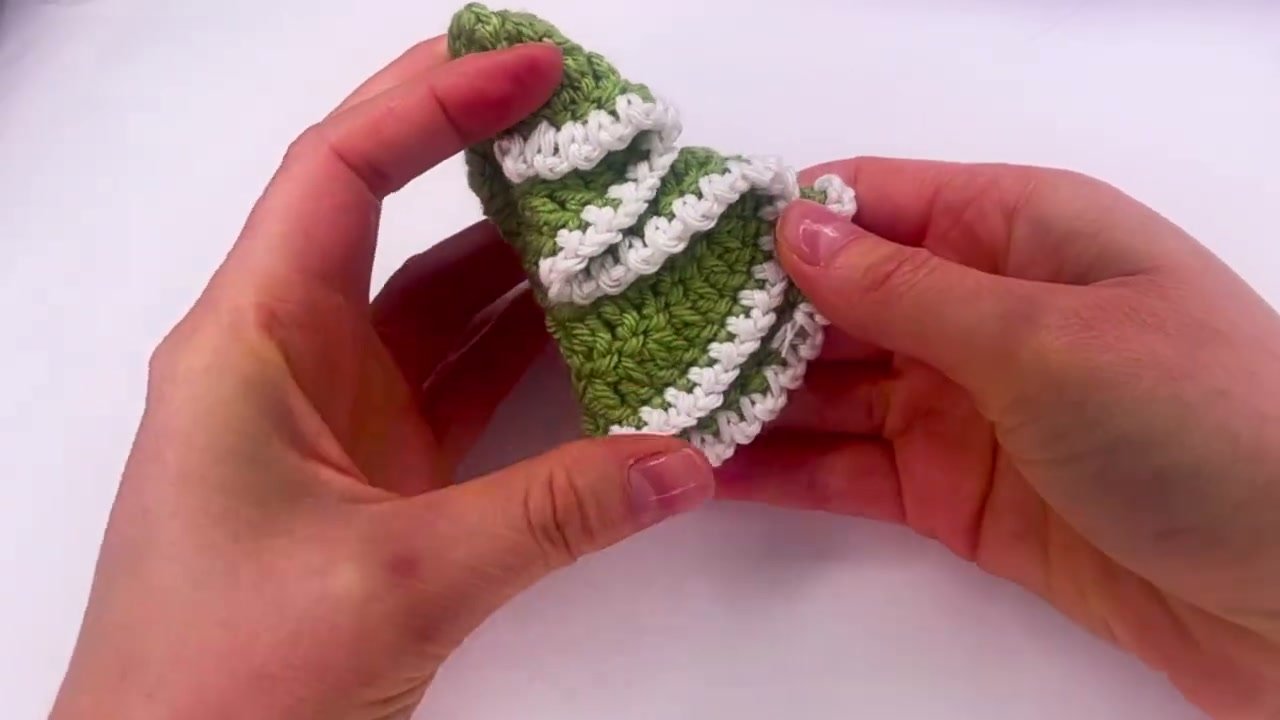
Method 1: The Accordion Tiered Fold (Featured)
- Lay your semi-circle flat on your table with the curved snowy edge facing you and the straight edge across the top.
- Locate the center top point (the starting magic ring/Row 1). This point will become the tip of your tree.
- Take the right side of the fan and fold it inward toward the center at an angle, creating the first sloping right edge.
- Fold the left side inward to overlap across the center, forming a pointed cone triangle at the top.
- Next, take the outer edges and pleat them back outward slightly like an accordion, letting the snowy bottom trim step down in tiers.
- Adjust the folds with your fingers until you see three distinct graduated tiers formed by the snowy border.
Method 2: The Symmetrical Ribbon Pleat
Alternatively, you can fold the two outer corners inwards so they meet exactly in the center spine, creating a clean geometric pyramid with flared bottom corners. Both looks are adorable, so experiment with your piece before securing!
Decorating and Finishing Your Tree
Once you are happy with the folded silhouette, secure and decorate your tree:
- Securing the Folds: Use a needle with matching green yarn to take a few hidden tacking stitches through the folded back layers. If you prefer a no-sew finish, a small dab of hot glue or fabric glue tucked into the fold creases will lock the shape permanently.
- Adding a Bow or Topper: Attach a tiny satin bow at the base or the top peak, or glue a miniature wooden star button right onto the summit.
- Pearl Ornaments: Sew small 3 mm white craft pearls onto the front pleats to look like tiny snowballs or baubles.
- Hanging Loop: Cut a 6-inch length of metallic ribbon or embroidery thread, knot the ends, and pull the loop through the top point of the tree to hang on branches.
Creative Holiday Uses for This Tree
Because these trees take only minutes to make, they are perfect for dozens of festive crafts beyond traditional tree ornaments:
- Gift Tag Accents: Tie one to the ribbon of a wrapped holiday present for an unforgettable personalized gift topper.
- Holiday Garlands: Crochet eight to ten trees in alternating forest green and mint, and string them along a length of jute twine for a cozy mantel banner.
- Greeting Cards: Glue a flat folded tree onto heavy cardstock to make handmade Christmas cards for your loved ones.
- Place Card Holders: Stand them on your holiday dinner table with a small handwritten name card tucked into the center pleat.
Frequently Asked Questions
Why does my semi-circle fan ruffle or cup before folding?
If your fan ruffles like a lettuce leaf, your tension may be too loose, or you may have added extra stitches accidentally. If it cups inward like a bowl, your stitches are too tight. Make sure you count your stitches at the end of each row to match the pattern counts (8, 16, 24, 32, and 40).
Can I make this tree with thicker yarn?
Yes! Worsted weight (Aran) or bulky yarn with a 4.0 mm or 5.0 mm hook will make a larger, heartier tree that looks fantastic standing on a shelf. Just make sure to press your folds firmly when shaping.
What if I don’t have contrast yarn for the border?
You can work the exact same [ch 2, sl st] border using the same green yarn! The chain-2 loops will still create a textured scalloped edge that catches the light nicely.
This little project is the perfect reminder that handmade holiday crafting doesn’t have to be stressful or time-consuming to be truly delightful. Keep a few folded trees on hand throughout December for sweet spontaneous gifts!
Happy crocheting, Meryem
One thought on “Easy and Fast Crochet Christmas Tree Tutorial & Pattern”