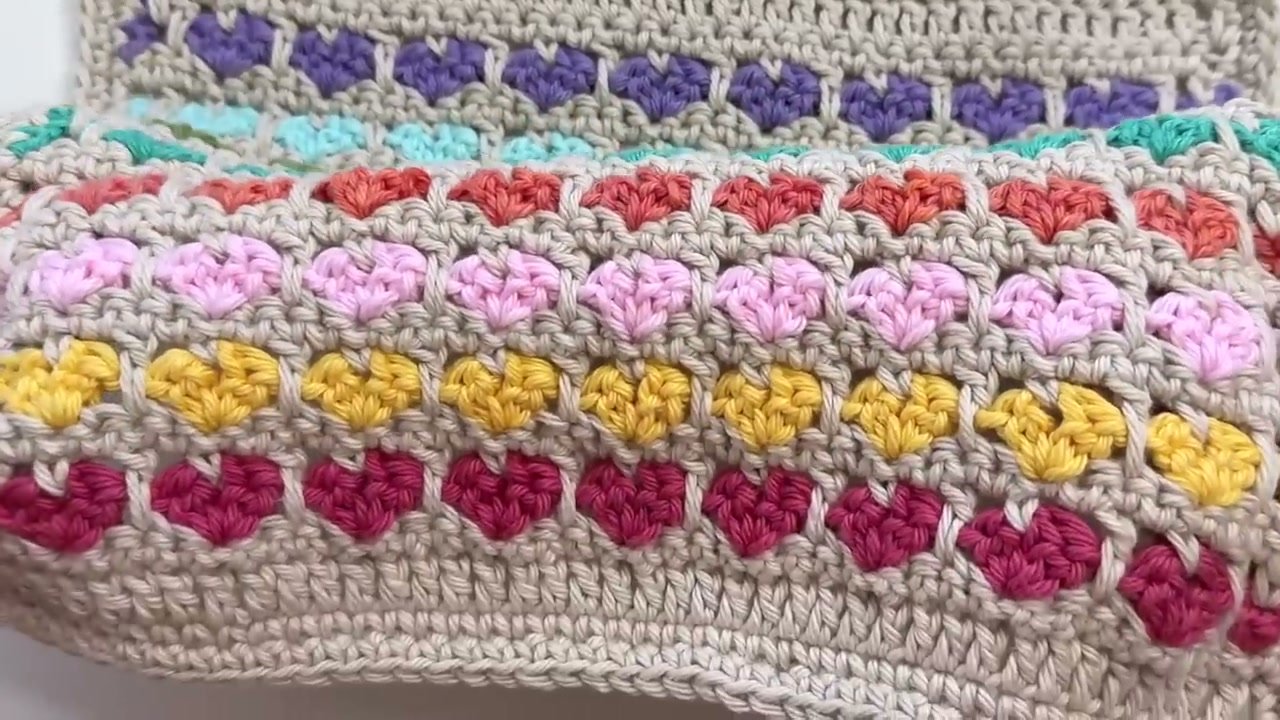
Welcome to this step-by-step crochet tutorial where I will teach you how to make this delightful crochet heart stitch worked in straight rows. This pattern creates rows of sweet, puffy little hearts nestled neatly between solid double crochet rows. It is an ideal stitch for baby blankets, romantic scarves, sweet table runners, or charming Valentine’s Day gifts.
Although the heart motifs look intricate, they are surprisingly easy to memorize once you complete your first repeat. The heart shape is created using a simple cluster of two double crochets together, separated by a chain space. In this tutorial, you will find the complete written pattern, step-by-step photos, and a clever color-carrying technique that drastically reduces the number of ends you have to weave in later.
Table of Contents
- What Will I Learn?
- Materials and Tools
- Pattern Notes
- Terms and Abbreviations
- The Written Pattern
- Video Tutorial
- Tips and Common Mistakes
- Make More / Related Patterns
- Frequently Asked Questions
- Sharing Your Make
What Will I Learn?
This crochet heart stitch is a wonderful way to expand your stitch vocabulary with confidence. In this tutorial, you will learn how to:
- Work a basic double crochet foundation row with an accurate stitch count.
- Crochet the heart cluster stitch using two double crochets worked together (dc2tog) into a single stitch.
- Work a filler row to bridge the gaps between hearts and keep your fabric flat and even.
- Carry your main base color along the side edges to eliminate constant fastening off and weaving in ends.
- Add a clean, balanced single crochet border around the raw edges of your project.
Materials and Tools
Below is the list of materials and tools I used for the sample in this tutorial. However, you can make this stitch pattern with any yarn weight you prefer.
- Yarn: Medium weight (weight 4 / Aran / worsted) cotton yarn. You will need two colors: a Main Base Color (such as white or cream) and a Contrasting Heart Color (such as soft pink, crimson, or lavender).
- Crochet Hook: 4.0 mm crochet hook (or the hook size recommended for your yarn). If you tend to make tight foundation chains, I suggest going up one full hook size (such as 5.0 mm) for the starting chain only.
- Tapestry Needle: For weaving in the yarn ends neatly.
- Scissors: For cutting yarn tails.
- Stitch Markers: Useful for marking the top of your turning chains and corner stitches on the border.
Yarn Substitution Tip: You can easily substitute a soft DK acrylic yarn or baby yarn for a lighter, floppier drape. Just ensure both colors are the same weight so your stitch tension stays consistent.
Pattern Notes
- Crochet Terms: This pattern is written in standard US crochet terms.
- Multiples: The stitch pattern is worked in multiples of 4 plus 1, with an extra 3 chains for the foundation turning chain (Total: multiple of 4 + 4). For example: 20 + 4 = 24 chains for a small swatch of 21 double crochets; 40 + 4 = 44 chains; 80 + 4 = 84 chains.
- Turning Chains: The initial turning chain does not count as a stitch.
- Starting the Heart Row: The heart rows are always started at the opposite side from where the base color working yarn sits. This allows you to carry your main color up the edge without cutting the yarn.
- Heart Stitch Structure: Each complete heart is formed by working: (2 double crochets together, chain 1, 2 double crochets together) into the exact same stitch.
Terms and Abbreviations
- ch: Chain
- st(s): Stitch(es)
- sk: Skip
- sc: Single crochet
- dc: Double crochet
- dc2tog: Double crochet 2 stitches together into the same stitch (cluster)
- ch-sp: Chain space
- Color A: Main background base color
- Color B: Contrasting heart color
The Written Pattern
Foundation Chain
Using Color A, make a slip knot and chain a multiple of 4 plus 4. For our demonstration swatch, chain 24.
Row 1 (Color A – Base Row)
Work 1 dc into the 4th chain from your hook (the skipped 3 chains do not count as a stitch). Work 1 dc into each chain across the row. You should end with an odd number of stitches. For our 24 starting chains, you will have 21 dc. Turn.

Row 2 (Color A – Texture Row)
Chain 1, turn. Work 1 sc into the very first stitch and into each stitch across the row. Work your final sc into the top of the last dc. Do not cut Color A. Leave the working loop on a locking stitch marker. (21 sc)
Design Choice Note: Working this single crochet row places the textured backside of the upcoming stitches on the right side, giving the hearts lovely dimensional depth. If you prefer flatter, smoother hearts, you can omit Row 2 and proceed directly to Row 3.
Row 3 (Color B – Heart Row)
Do not turn your work. Move to the opposite side of Row 2 (the beginning of the row, away from where Color A yarn is resting). Join Color B with a slip knot in the very first stitch. Chain 2, then work 1 dc into the same stitch (this acts as our starting half-heart). Chain 2.
*Skip the next 3 stitches. In the 4th stitch, work your first complete heart: [yarn over, insert hook into stitch, pull up a loop, yarn over, pull through 2 loops (2 loops remain on hook). Yarn over, insert hook into the same stitch, pull up a loop, yarn over, pull through 2 loops (3 loops on hook). Yarn over and pull through all 3 loops (first half of heart made). Chain 1. In the same stitch, repeat the 2-dc cluster to make the second half of the heart]. Chain 2.*
Repeat from * to * across the row until 4 stitches remain. Skip 3 stitches. In the final stitch, work one 2-dc cluster (half-heart). On the final pull-through of this last stitch, pick up Color A from the side and pull it through. Fasten off Color B. (21 sts including chains)

Row 4 (Color A – Filler Row)
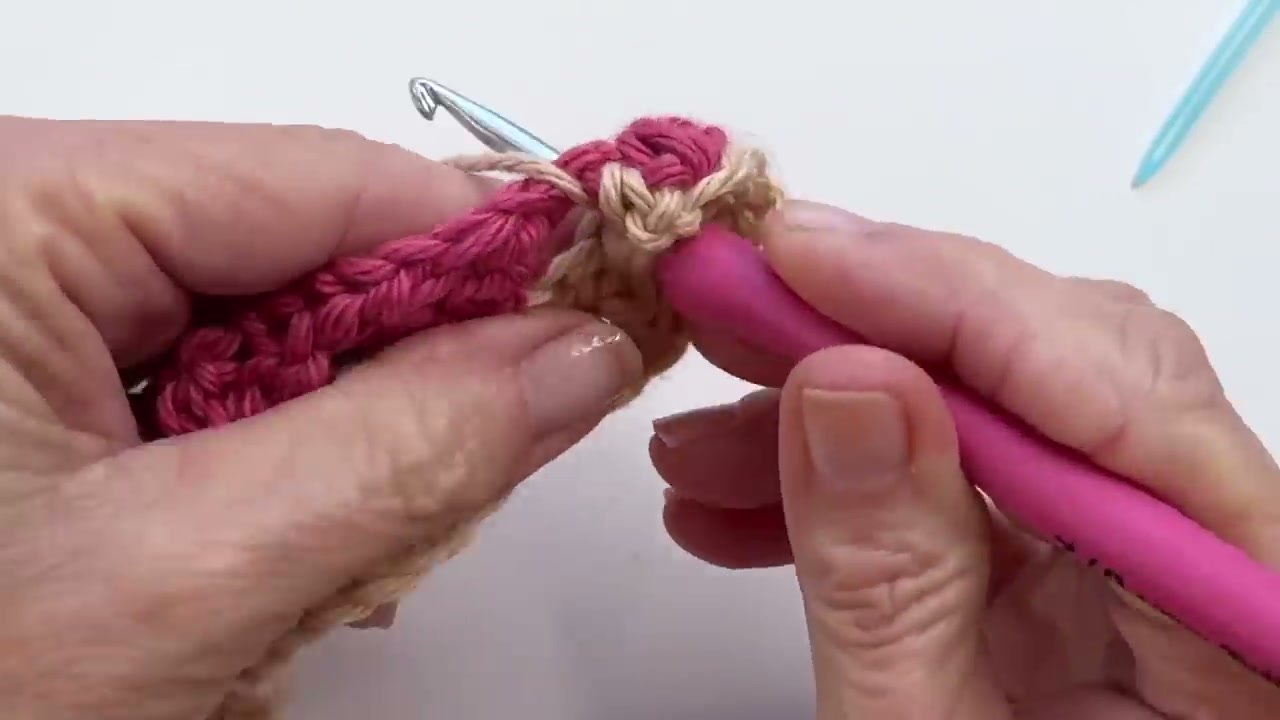
With Color A, chain 1, turn (chaining an extra chain loosely for wiggle room if needed). Work 1 sc into the first stitch. Chain 1. Look down at the row below the heart stitches (the 3 skipped stitches from Row 2). Work 1 dc into the center stitch of those 3 skipped stitches, pulling the loop up to the working height. Chain 1.
*Work 1 sc into the center chain-1 space of the heart. Chain 1. Work 1 dc into the center of the 3 skipped stitches below the heart row. Chain 1.* Repeat from * to * across the row, ending with 1 sc in the last half-heart stitch. Turn.
Row 5 (Color A – Leveling Row)
Chain 1, turn. Work 1 sc into the very first stitch. Work 1 sc into the next chain-1 space. Work 1 sc into the next dc. *Work 1 sc into the next chain-1 space, 1 sc into the sc above the heart, 1 sc into the chain-1 space, 1 sc into the dc.* Repeat from * to * across the row, ending with a single crochet in the final stitch. When you count your stitches, you should have your original stitch count (21 sc). Do not cut Color A.

Pattern Repeat
Repeat Rows 3 through 5 for the body of your project. Each repeat adds another neat row of hearts framed by clean, solid background rows.
Final Row (Color A)
To match the foundation row, finish your project with a final row of double crochet: Chain 1, turn. Work stacked single crochets or a chain 2 and 1 dc in the first stitch, then work 1 dc in each stitch across to the end. Fasten off Color A or continue directly to the border.
Side Border and Finishing
Work a single crochet border around all four sides of the blanket to give the edges a polished finish and hide any carried yarn strands:
Join Color A at any corner. Work (1 sc, ch 1, 1 sc) in each corner. Along the sides, work approximately 2 single crochets per double crochet row edge and 1 single crochet per single crochet row edge. Join to the first stitch with an invisible join or slip stitch, fasten off, and weave in your ends.

Video Tutorial
If you prefer watching hands in action, you can follow the video demonstration alongside this written guide:
Follow the timestamps noted above to reference each specific row demonstration.
Tips and Common Mistakes
- Starting on the Correct Side: Always join your contrasting heart color at the opposite end of the active base yarn. If you join on the same side, you will not be able to carry your base color smoothly up the edge.
- Elongating the Filler Double Crochets: In Row 4, when working double crochets into the skipped stitches below the heart, draw your loop up comfortably to the height of the current row so your fabric does not pull inward or bunch.
- Stitch Count Verification: Count your single crochets after every Row 5 leveling row. It should always match your starting stitch count exactly (e.g. 21 stitches).
- Neat Side Loops: When working the leveling row after a heart row, you can catch the chain-2 loop of the heart along with your chain-1 space to pull the edge upward and keep the sides remarkably neat.
Make More / Related Patterns
If you enjoy making crochet blankets with textured stitches, check out these related tutorial patterns:
- Crochet Beanie Pattern : https://cozyknotty.com/crochet-beanie-pattern/
- Crochet Cardigan Pattern : https://cozyknotty.com/crochet-cardigan-pattern/
- Crochet daisy granny square : https://cozyknotty.com/daisy-granny-square/
Frequently Asked Questions
Is this crochet heart stitch suitable for beginners?
Yes, as long as you know how to make single crochets, double crochets, and chains, you can easily make this stitch. The heart cluster is just two partial double crochets finished together in the same stitch.
Can I make this project using different colors for each row of hearts?
Yes, this pattern is fantastic for stash-busting! You can keep a consistent white or cream background color and make each row of hearts in a different leftover yarn color (such as a rainbow sequence).
How do I calculate the starting chain for a full blanket?
Measure a small swatch over a multiple of 4 chains. For a standard 36-inch baby blanket, chain a multiple of 4 that matches your desired width, then add 4 chains at the end before beginning Row 1.
Sharing Your Make
I would love to see how your crochet heart project turns out! Please share your finished blanket or swatch in the comments below or tag me on social media with your makes. Happy crocheting, Meryem.