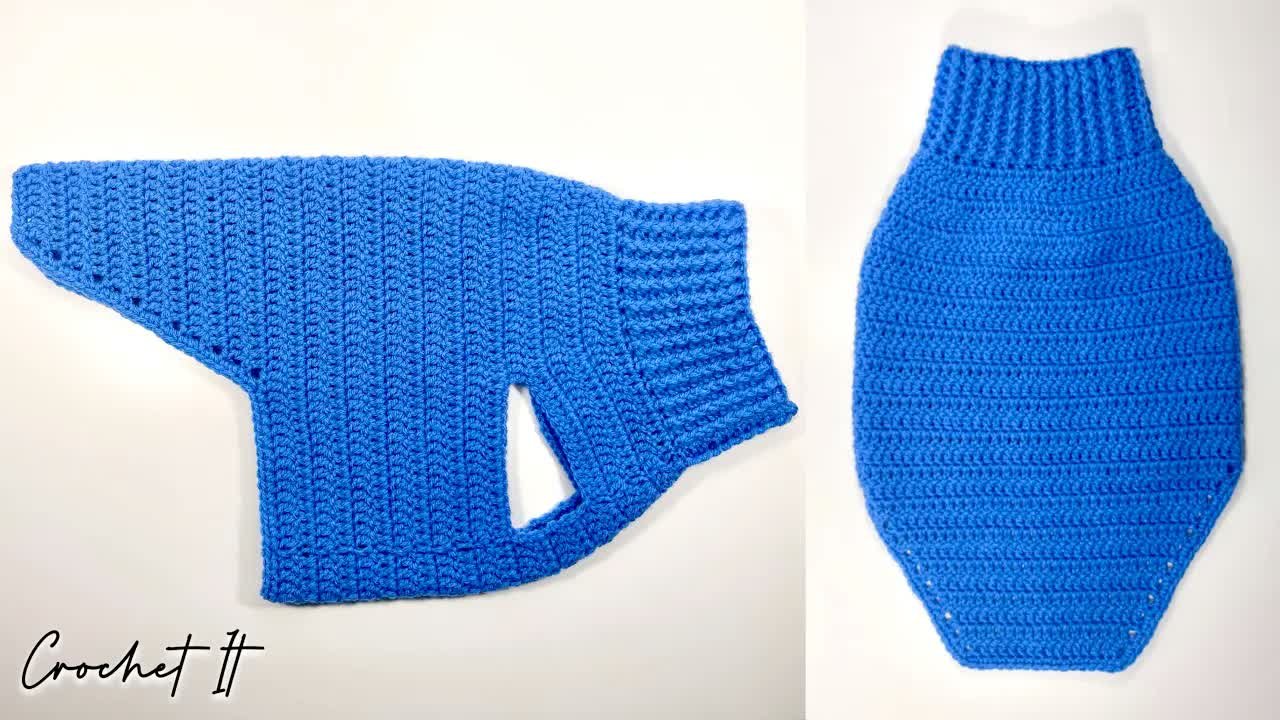
If you have been looking for a cosy project for your furry friend, you are going to love this one. In this tutorial I am going to show you how to crochet a size medium dog sweater, starting at the collar and working your way all the way down to the tail in one go — no seaming required. Below you will find the full video tutorial and the complete written pattern, so you can follow whichever works best for you.
This pattern uses just a few basic stitches, and because you work it from the top down in a single piece, it is a great project for crocheters who are still building their confidence. Grab your hook and let’s get started.
Table of Contents
What Will I Learn?
—
By following this tutorial you will practise a handful of essential crochet skills that come in useful across many other patterns. The sweater covers:
– Crocheting in the round from a foundation chain
– Working into the ‘back bump‘ of a chain
– Front post double crochet (FPdc) and back post double crochet (BPdc) for a ribbed collar
– Increases to shape the body
– Creating leg holes using chains and skipped stitches
– Decreases to taper the tail section
– Finishing with a single crochet edging
—
Materials and Tools
The finished blue crochet dog sweater held up to show the ribbed collar, leg holes, and tapered tail
The finished medium dog sweater — ribbed collar at the top, leg holes in the middle, tapered tail at the bottom.
– Yarn: Two colours of yarn . choose a yarn that suits your chosen hook. I would recommend a DK or Aran weight when you are starting out, as it is easier to see your stitches.
– Hook: choose a size to match your yarn
– Scissors
– Yarn needle : for weaving in ends
Please note:You can use any weight yarn for this pattern as long as you use the matching hook size. The finished measurements will vary depending on your yarn and tension.
—
Pattern Notes and Abbreviations
This pattern is written in **US crochet terms**.
| Abbreviation | Meaning |
|—|—|
| ch | chain |
| sl st | slip stitch |
| dc | double crochet |
| sc | single crochet |
| FPdc | front post double crochet |
| BPdc | back post double crochet |
| inc | increase (2 dc into the same stitch) |
| sk | skip |
| st(s) | stitch(es) |
| Rnd | round |
Important notes:
– Ch-2 at the beginning of a round counts as a double crochet throughout, unless stated otherwise.
– The sweater is worked from the collar downward. The collar is crocheted in the round; once the body section begins the work is turned at the end of each row.
– Do not work an extra dc into the same stitch as the starting ch-2.
—
The Written Pattern
Size: Medium dog
Construction: Worked from collar to tail in one piece — no seaming required.
—
Collar
Hands working Round 1 of the dog sweater collar, crocheting a slip stitch into the back bump of the blue foundation chain
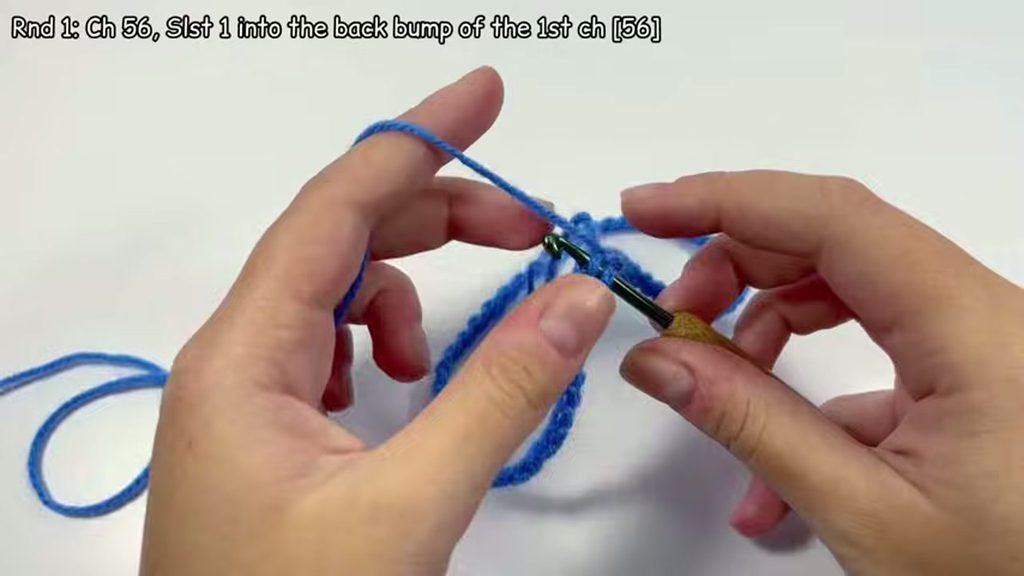
Round 1: slip stitching into the back bump of the 56-stitch foundation chain to form the collar.
Using your first colour yarn, make a slip knot.
Rnd 1: Ch 56. Sl st 1 into the back bump of the first chain. Continue sl st into each back bump all the way around. (56 sts)
Rnd 2: Ch 2 (counts as dc). Dc 1 into each back bump all the way around. Sl st 1 into the second chain. (56 sts)
Hands working front post and back post double crochet to create a raised ribbed texture on the blue collar piece
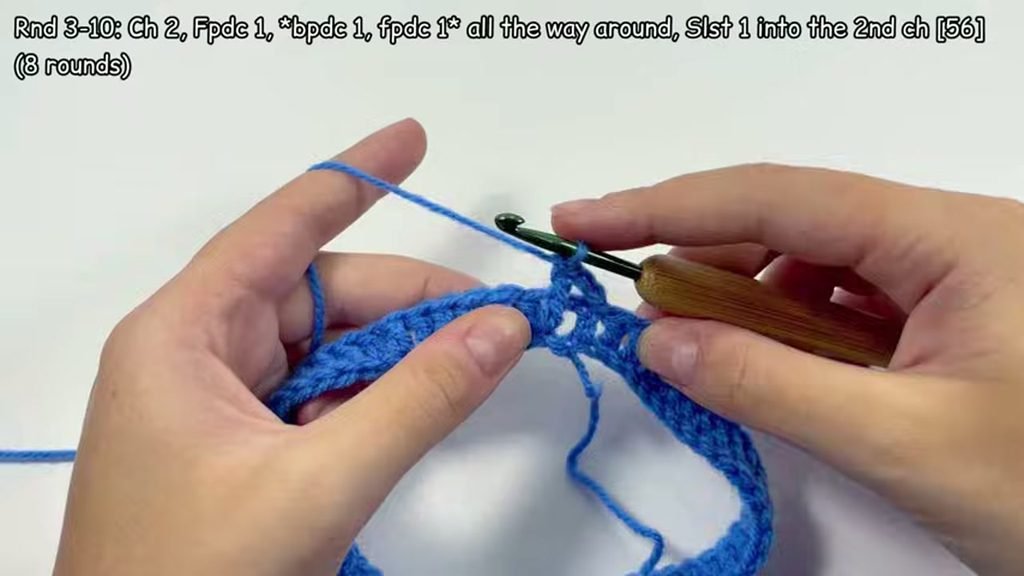
Rounds 3–10: alternating FPdc and BPdc builds the raised ribbing around the collar.
Rnds 3–10: Ch 2. \*FPdc 1, BPdc 1; repeat from \* all the way around. Sl st 1 into the second chain. (56 sts)
Repeat for a total of 8 rounds. Turn your work.
—
Body
Rnd 11: Ch 2. Dc 11, inc 1, dc 10, inc 1. Continue all the way around. Turn your work. (60 sts)
Rnd 12: Ch 2. Dc 10, inc 1, dc 11, inc 1. Continue all the way around. Turn your work. (65 sts)
Rnd 13: Ch 2. Dc 11, inc 1, dc 12, inc 1. Continue all the way around. Turn your work. (70 sts)
Rnd 14: Ch 2. Dc 12, inc 1, dc 13, inc 1. Continue all the way around. Turn your work. (75 sts)
Rnd 15: Ch 2. Dc 13, inc 1, dc 14, inc 1. Continue all the way around. Turn your work. (80 sts)
Rnds 16–19: Ch 2. Dc 9. [CHECK: full stitch sequence for Rnds 16–19 not fully audible in video at 10:22] Turn your work. (80 sts) Repeat for a total of 4 rounds.
—
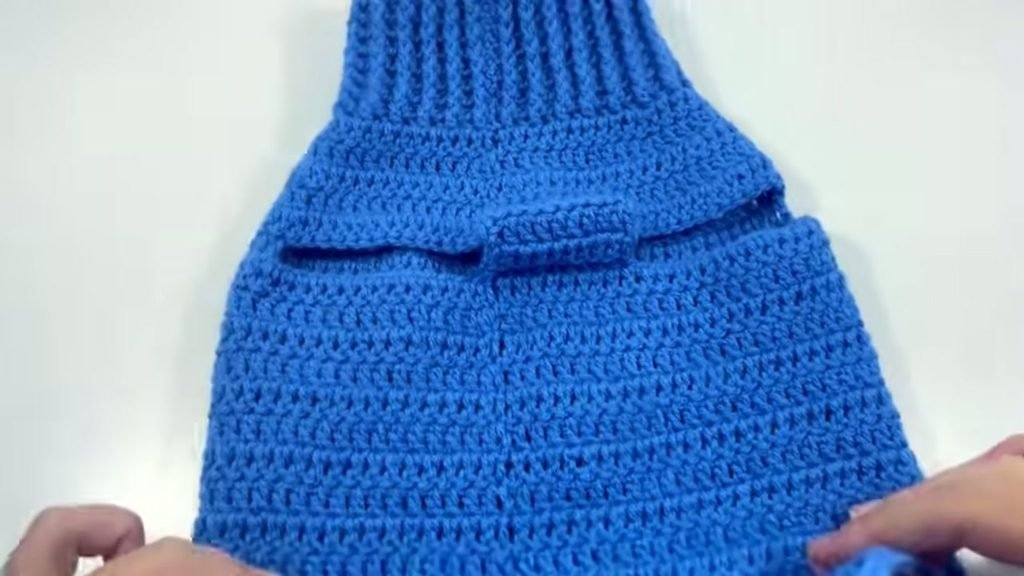
Leg Holes
Hands chaining 14 stitches over the skipped leg hole opening in the blue dog sweater body, Round 20
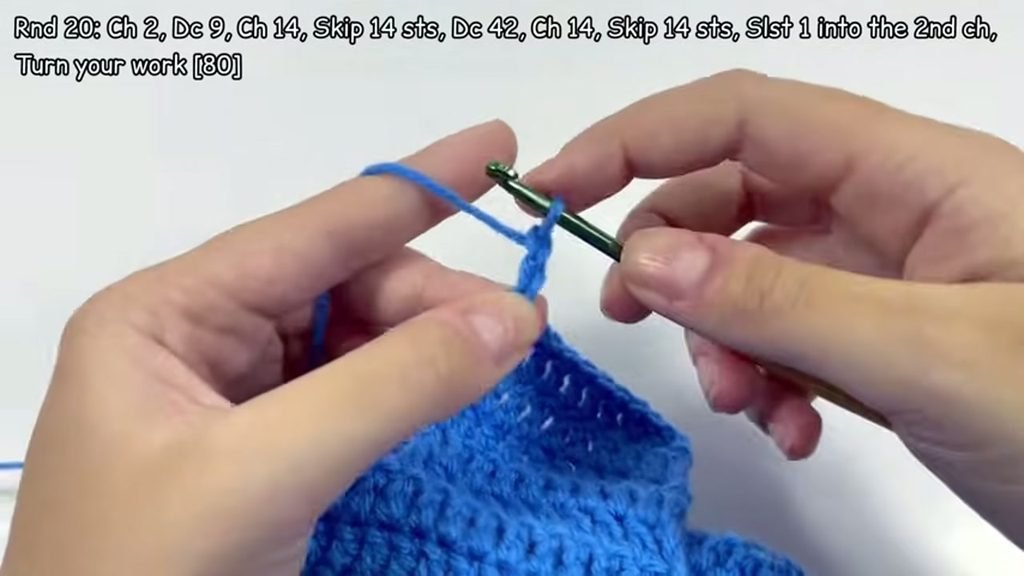
Round 20: chaining over 14 skipped stitches on each side creates the front leg openings.
Rnd 20: Ch 2. Dc 9, ch 14, sk 14 sts, dc 42, ch 14, sk 14 sts. Sl st 1 into the second chain. Turn your work. (80 sts)
Rnds 21–32: Ch 2. Dc 1 into each stitch all the way around. Turn your work. (80 sts)
Repeat for a total of 12 rounds.
—
Tail Section
Rnd 33: Sl st 15. Ch 2. Sk 1 st, dc 38, sk 1 st, dc 1. Turn your work. (40 sts)
Rnd 34: Ch 2. Sk 1 st, dc 36, sk 1 st, dc 1. Turn your work. (38 sts)
Rnd 35: Ch 2. Sk 1 st, dc 34, sk 1 st, dc 1. Turn your work. (36 sts)
Rnd 36: Ch 2. Sk 1 st, dc 32, sk 1 st, dc 1. Turn your work. (34 sts)
Rnd 37: Ch 2. Sk 1 st, dc 30, sk 1 st, dc 1. Turn your work. (32 sts)
Rnd 38: Ch 2. Sk 1 st, dc 28, sk 1 st, dc 1. Turn your work. (30 sts)
Rnd 39: Ch 2. Sk 1 st, dc 26, sk 1 st, dc 1. Turn your work. (28 sts)
Rnd 40: Ch 2. Sk 1 st, dc 24, sk 1 st, dc 1. Turn your work. (26 sts)
Rnd 41: Ch 2. Sk 1 st, dc 22, sk 1 st, dc 1. Turn your work. (24 sts)
Rnd 42: Ch 2. Sk 1 st, dc 20, sk 1 st, dc 1. Turn your work. (22 sts)
Rnd 43:Ch 2. Sk 1 st, dc 18, sk 1 st, dc 1. Turn your work. (20 sts)
Rnd 44: Ch 2. Sk 1 st, dc 16, sk 1 st, dc 1. Turn your work. (18 sts)
—
Edging
Hands working single crochet edging along the tail end of the blue dog sweater, Round 45
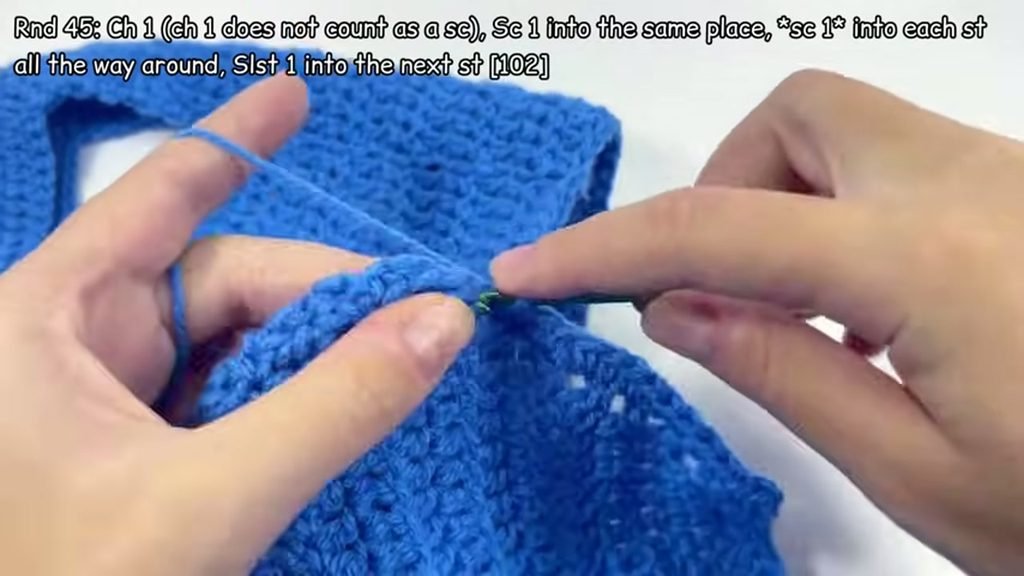
Round 45: single crochet all the way around for a neat, stretchy edge along the tail.
Rnd 45: Ch 1 (does not count as a stitch). Sc 1 into the same place. Sc 1 into each stitch all the way around. Sl st 1 into the next stitch. (102 sts)
Fasten off and weave in all yarn ends.
—
Video Tutorial
If you prefer to follow along visually, the full step-by-step video is right here. You can pause and rewind as many times as you need.
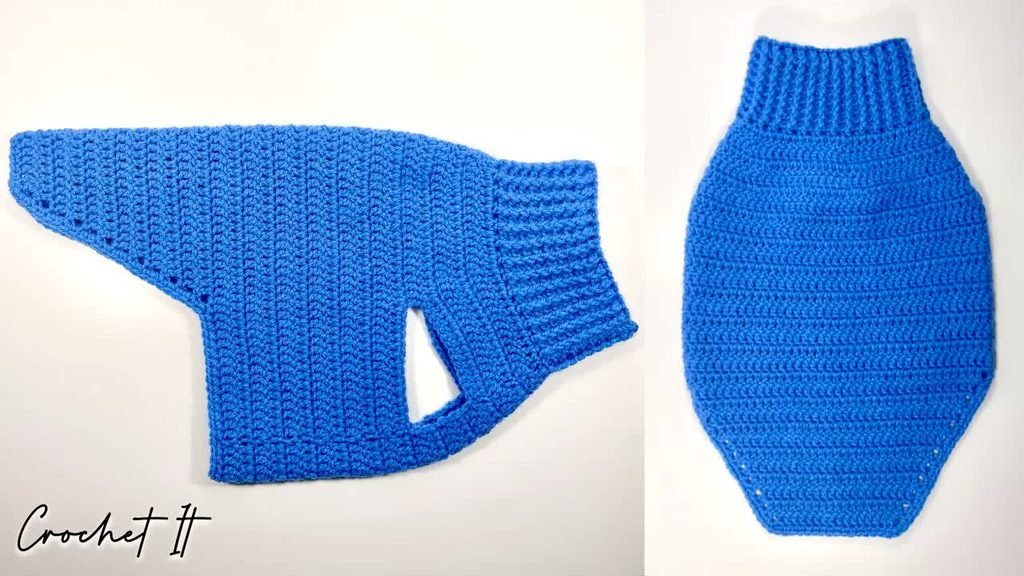
*[Watch on YouTube: Crochet dog sweater | Medium | Crochet in one go | Full tutorial | Crochet It]
—
Tips and Common Mistakes
– The sweater is worked in one piece from collar to tail — there is no need to join or seam separate sections.
– Ch 2 counts as a dc throughout the body, so do not work an extra dc into the same stitch as the chain-2.
– When working the ribbing in Rounds 3–10, keep your post stitches consistent: FPdc over FPdc and BPdc over BPdc on every round.
– In Round 20, the chains that create the leg holes bridge over exactly 14 skipped stitches on each side. Count carefully before you skip.
– The tail section begins with slip stitches at Round 33 to reposition the yarn before the decreases start. Do not count these slip stitches in your stitch count.
—
FAQ
Can I make this sweater in a different size?
The tutorial is designed for a medium-sized dog. To adjust the size, you would change the starting chain count and re-work the increase and decrease sections accordingly. A good starting point is to measure your dog’s neck circumference and chest girth, then swatch to find the right stitch count for your yarn and hook combination.
What does “work into the back bump” mean?
When you look at the bottom of a foundation chain, you will see a row of small bumps running along the back. Working into these bumps rather than the standard V-shape gives you a neater, more even edge at the start of the collar. It is a small step that makes a noticeable difference to the finished look.
What are FPdc and BPdc, and why are they used here?
FPdc and BPdc are stitches worked around the post (the vertical part) of the stitch below, rather than into the top loops. Alternating them creates the raised ribbed texture on the collar, which also gives the neckline a little stretch so it fits comfortably around the dog.
Do I need to sew the sweater together at the end?
No. One of the key features of this pattern is that you crochet the entire sweater in one go, from the collar right down to the tail. The only finishing step is to weave in your yarn ends once you have fastened off after Round 45.
—
*I would love to see your finished dog sweater, so please share it in the comments below or tag me in your photos. Happy crocheting, Meryem.*