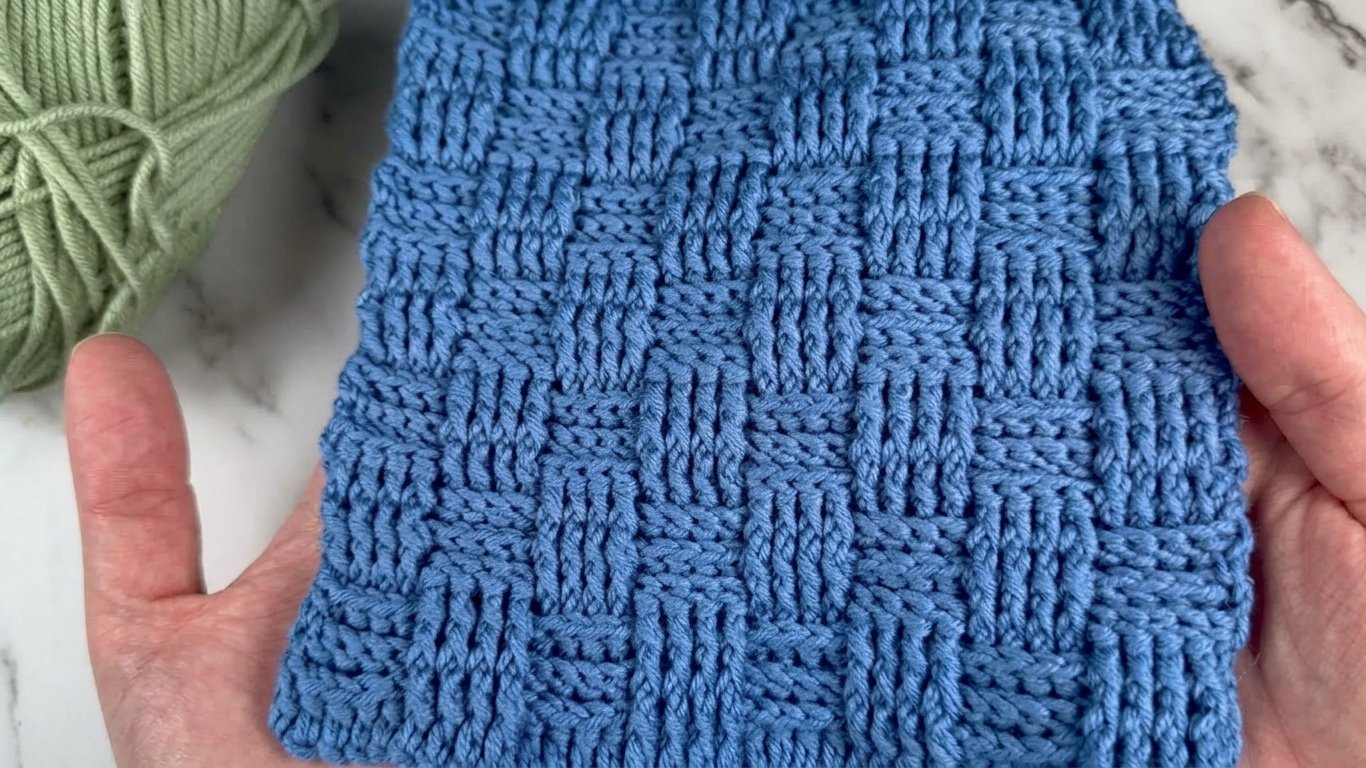
If you want to add rich, tactile texture to your handmade projects, the crochet basketweave stitch is one of the most rewarding patterns you can learn. By alternating groups of front post and back post double crochet stitches, this technique produces a dense, woven fabric that resembles interwoven wicker strands. It is completely reversible, luxuriously thick, and remarkably squishy, making it ideal for cosy baby blankets, winter scarves, textured washcloths, and sturdy home decor. Below you will find the complete written pattern and step-by-step video tutorial.
Although post stitches might look intricate at first glance, the rhythm is easy to master once you understand how to place your hook around the vertical posts. Because the stitch repeat follows a predictable grid, you can quickly settle into a relaxing, mindful crochet pace. Grab your hook, pick out your favourite yarn, and let’s explore this timeless stitch together.
Table of Contents
- What Will I Learn?
- Materials and Tools
- Sizing and Stitch Multiples
- Pattern Notes and Abbreviations
- Special Stitches
- The Written Pattern
- Video Tutorial
- Tips and Common Mistakes
- Make More
- FAQ
What Will I Learn?
Following this tutorial will guide you through several essential textured crochet skills:
- Understanding post stitches and identifying the vertical stem of a double crochet
- Crocheting Front Post Double Crochet (FPdc) to create raised vertical ribs
- Working Back Post Double Crochet (BPdc) with comfortable hook angles and loose tension
- Reading your work row by row to know whether to work stitches “as they appear” or switch them
- Setting up a clean, straight edge using turning chains and edge balance stitches
- Calculating foundation multiples to adapt the stitch to any blanket, scarf, or washcloth width
Materials and Tools
Here is what I recommend for practicing this stitch and completing your swatch:
- Yarn: DK or light worsted weight yarn. In the tutorial, I used Drops Merino Extra Fine (100% extra fine merino wool, 50 g / 105 m / 115 yds). You can use any smooth worsted, Aran, or DK yarn in your stash.
- Crochet Hook: 4.0 mm (US size G-6) crochet hook, or the size recommended on your yarn label.
- Tapestry Needle: For weaving in your yarn tails.
- Scissors
Please note on yarn selection: When learning the basketweave stitch for the first time, choose a smooth, solid-coloured yarn in a light or pastel shade. Dark, fluffy, or heavily variegated yarns can obscure the stitch posts, making it harder to see where your hook should go.
Sizing and Stitch Multiples
The basketweave stitch is worked over a foundation chain that is a multiple of 4.
Here is how the stitch count works out:
- Foundation Chain: Any multiple of 4 (such as 16, 20, 24, 28, or 32).
- Row Stitch Count: Your working stitch count across each row will always equal 2 stitches less than your foundation chain.
- Example from the swatch: If you chain 20, skipping the first 3 chains leaves 18 stitches in each row (1 turning chain stitch at the start, 16 pattern stitches in four groups of 4, and 1 edge double crochet at the end).
- Common Project Widths:
- Dishcloth / Washcloth (approx 8 x 8 inches): Chain 28 (26 sts across).
- Warm Winter Scarf (approx 7 to 8 inches wide): Chain 24 or 28.
- Baby Blanket (approx 32 to 36 inches wide): Chain 112 to 124.
- Throw Blanket (approx 48 to 52 inches wide): Chain 168 to 180.
Pattern Notes and Abbreviations
This pattern is written in standard US crochet terms. If you are accustomed to UK terms, please note that a US double crochet corresponds to a UK treble crochet.
| Abbreviation | Meaning |
|---|---|
| ch | chain |
| st(s) | stitch(es) |
| dc | double crochet |
| FPdc | front post double crochet |
| BPdc | back post double crochet |
| rep | repeat |
Pattern Logic:
- Setup Row: A simple row of double crochet worked into your starting chain provides the posts needed for Row 1.
- Block Width: Stitches alternate in groups of 4 FPdc and 4 BPdc across the row, framed by 1 edge double crochet on each end.
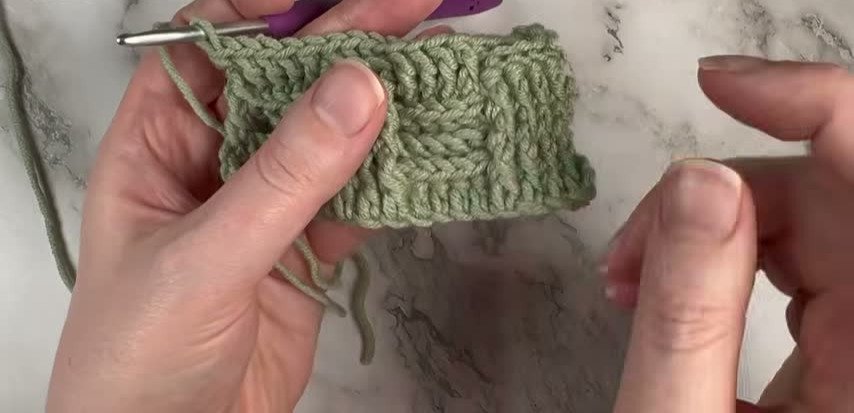
- Block Height: Each woven block is worked across 3 rows.
- Rows 1 to 3: Work stitches “as they appear” (working FPdc over FPdc and BPdc over BPdc) to form the first 3-row block.
- Row 4 (The Switch Row): Reverse the stitches (work BPdc over FPdc, and FPdc over BPdc) to alternate the tiles.
- Rows 5 and 6: Work stitches “as they appear” again to finish the second 3-row block.
- Vertical Repeat: Rows 1 through 6 form the complete 6-row pattern repeat.
Special Stitches
Front Post Double Crochet (FPdc)
Yarn over, insert your hook from the front of your fabric to the back, and then back out to the front around the vertical post of the next stitch. Yarn over and pull up a loop to the front (3 loops on hook). [Yarn over, pull through 2 loops] twice to complete the double crochet. The stitch sits forward, forming a raised vertical rib.
Back Post Double Crochet (BPdc)
Yarn over, insert your hook from the back of your fabric to the front, and then back out to the back around the vertical post of the next stitch. Yarn over and pull up a loop to the back of your work. Keep this loop pulled up loosely so you only have 3 loops on your hook. [Yarn over, pull through 2 loops] twice to finish the stitch. The top ridge of the previous stitch is pushed forward, creating a horizontal bar.
The Written Pattern
Setup Row
- Chain a multiple of 4 (for this tutorial swatch, chain 20).
- Work 1 dc into the 4th chain from your hook (the 3 skipped chains count as your first double crochet).
- Dc into each chain across to the end of your foundation chain. Turn. (18 dc, including the starting ch-3)
Row 1 (First Texture Row)
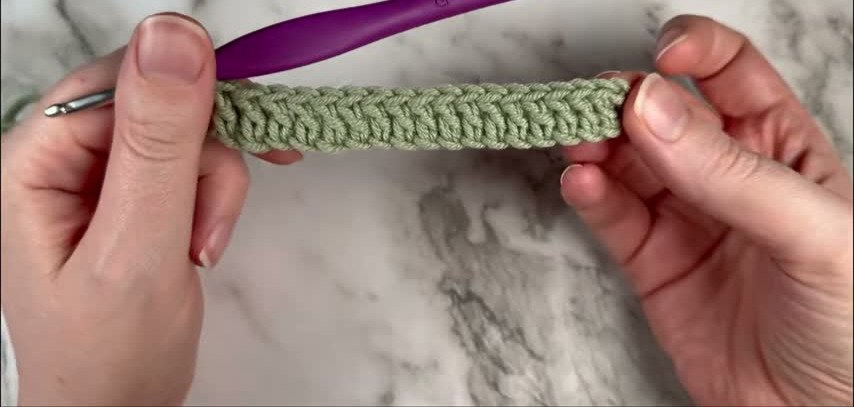
- Ch 3 (counts as your first dc here and throughout). Turn your work.
- Skip the first stitch at the base of the chain-3.
- Work 1 FPdc around each of the next 4 stitches.
- Work 1 BPdc around each of the next 4 stitches.
- Repeat alternating [4 FPdc, 4 BPdc] across the row until only 1 stitch remains (the turning chain-3 from the setup row).
- Work 1 regular dc into the top of the turning chain-3. Turn. (18 sts total: 1 ch-3, 16 post stitches in groups of 4, 1 edge dc)
Row 2 (Matching Texture)
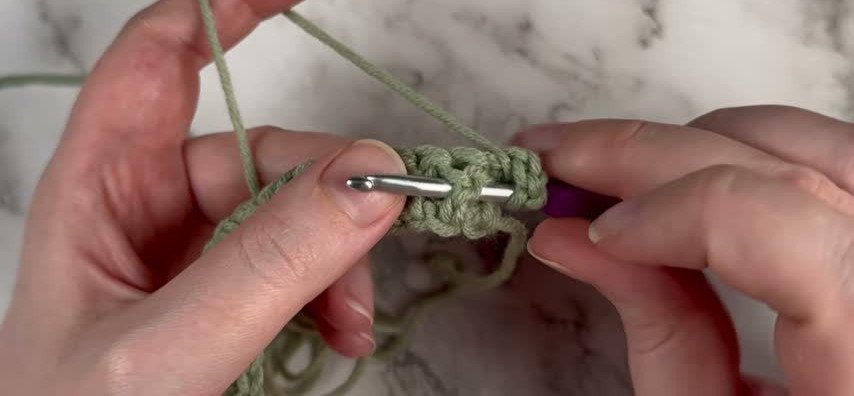
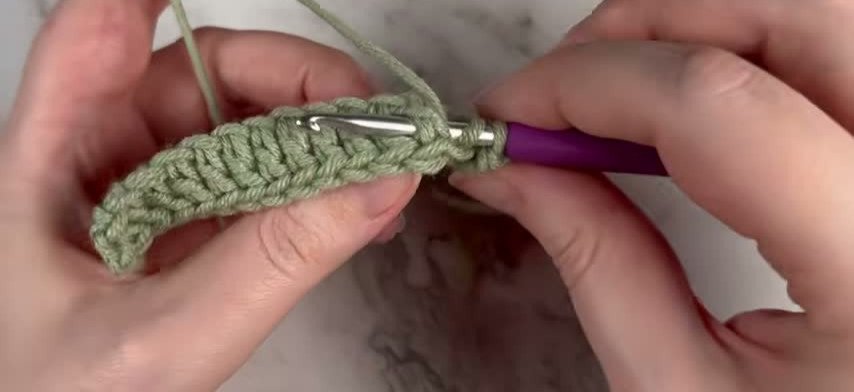
- Ch 3 (counts as first dc), turn. Skip the first stitch.
- Look at your stitches as they face you:
- Where you see raised vertical ribs, work 1 FPdc around each of the 4 stitches.
- Where you see horizontal ridges, work 1 BPdc around each of the 4 stitches.
- Continue alternating [4 FPdc, 4 BPdc] across the row to match the texture from Row 1.
- Work 1 regular dc into the top of the turning chain-3. Turn.
(Do not worry if your swatch wiggles or pulls slightly inward during Rows 2 and 3; this natural tension relaxes once the blocks alternate in Row 4).
Row 3 (Completing the First 3-Row Block)
- Ch 3 (counts as first dc), turn. Skip the first stitch.
- Continue working stitches “as they appear”: work FPdc over FPdc, and BPdc over BPdc across the row.
- Work 1 regular dc into the top of the turning chain-3. Turn.
(You have now finished your first 3-row woven block).
Row 4 (The Switch Row)
(In this row, we reverse our stitch choices to shift the woven tiles and create the basketweave grid).
- Ch 3 (counts as first dc), turn. Skip the first stitch.
- Look at the stitches below and do the opposite:
- Above the raised vertical ribs (FPdc), work 1 BPdc around each of the next 4 stitches.
- Above the horizontal ridges (BPdc), work 1 FPdc around each of the next 4 stitches.
- Continue working the opposite stitch across each 4-stitch group until 1 stitch remains.
- Work 1 regular dc into the top of the turning chain-3. Turn.
Row 5 (Matching New Texture)
- Ch 3 (counts as first dc), turn. Skip the first stitch.
- Work stitches “as they appear” to match Row 4: work BPdc around BPdc, and FPdc around FPdc across the row.
- Work 1 regular dc into the top of the turning chain-3. Turn.
Row 6 (Completing the Second 3-Row Block)
- Ch 3 (counts as first dc), turn. Skip the first stitch.
- Work stitches “as they appear”: work BPdc around BPdc, and FPdc around FPdc across the row.
- Work 1 regular dc into the top of the turning chain-3. Turn.
Growing Your Project
To continue growing your project, repeat Rows 1 through 6 consecutively until your piece reaches your desired length.
To complete your fabric with a balanced, symmetrical look, finish your project on either a Row 3 or a Row 6 (the end of a complete 3-row tile). Fasten off and weave in all loose yarn tails securely on the wrong side.
Video Tutorial
If you prefer to watch the exact hook placement and loop-pulling angles step by step, follow along with the video tutorial below:
https://www.youtube.com/watch?v=eLLsgNwpHYM
Tips and Common Mistakes
- Avoid the Fourth Loop on BPdc: When pulling up a loop for Back Post Double Crochet, bring the loop straight up to the working row level before completing the stitch. If you pull around your previous yarn-over, you will accidentally trap four loops on your hook instead of three.
- Keep Your Tension Relaxed: Post stitches naturally draw fabric together and consume more yarn than standard double crochet. If your work feels stiff or curved, switch to a hook that is 0.5 mm or 1.0 mm larger than the yarn recommends.
- Always Anchor the Edge Double Crochets: Placing a standard double crochet into the top of the turning chain at the end of every row keeps your edges straight and prevents the post stitches from pulling the borders inward.
- Expect Initial Waving: Do not unravel your work if Rows 1 to 3 look wavy. The opposing tension introduced in Row 4 balances the fabric and flattens out the swatch.
Make More
- Crochet pet sweater dress —> https://crochetpattern.us/crochet-pet-sweater-dress/
- Crochet Witch Hat Pattern — Full Tutorial —> https://crochetpattern.us/crochet-witch-hat-pattern-full-tutorial/
- Crochet Hat Patterns —> https://crochetpattern.us/crochet-hat-patterns-adult-bucket-hat/
FAQ
Is the crochet basketweave stitch reversible?
Yes! Because the pattern alternates groups of front and back post stitches across the same number of rows and columns, the front and back of the fabric look identical. This makes it an outstanding choice for scarves, baby blankets, and throws where both sides show.
Does the basketweave stitch use a lot of yarn?
Because post stitches wrap around the body of previous stitches rather than into the top loops, the basketweave stitch creates a dense, multi-layered fabric. As a result, it uses roughly 25% to 30% more yarn than plain double crochet.
Can I make 3-stitch or 5-stitch basketweave blocks?
Yes! You can customize the scale of your tiles. For example, a 3×3 basketweave uses multiples of 3 plus 2 edge stitches and repeats every 3 rows. A larger 5×5 basketweave uses multiples of 5 plus 2 edge stitches and alternates every 4 or 5 rows. The 4×3 version demonstrated here provides the classic woven basket proportion.
How do I add a neat border to a basketweave blanket?
Because the side edges already feature clean turning chains, working a single round of single crochet evenly around the perimeter followed by a simple ribbed or moss stitch border finishes the blanket beautifully.
I would love to see what you create with this rich, woven texture, so please share your swatches and blanket plans in the comments below. Happy crocheting, Meryem.
One thought on “Crochet basketweave stitch”