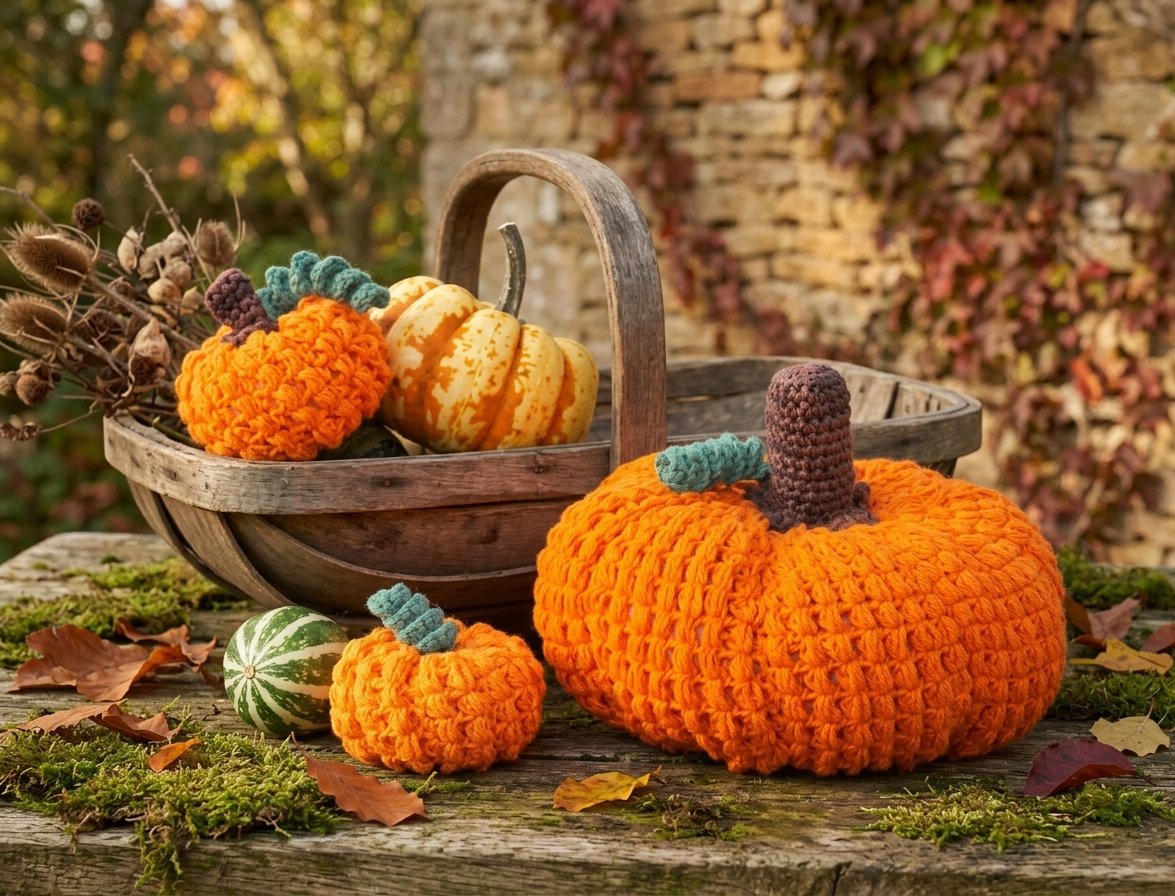
Want to crochet a pumpkin for fall? See sizes, yarn, hook, gauge and skill level for this easy crochet pumpkin trio before you start
Fall decorating feels better when a few pieces are handmade. This crochet pumpkin pattern gives you three pumpkins, one big and two mini, that look best grouped together on a shelf, mantel, or side table. The design is Pumpkin Patch Crochet Pumpkins from Yarnspirations. It’s rated Easy, and the puff stitches give the pumpkins their plump, rounded shape.
A quick note before we start: this post is a planning guide, not the full pattern. The round-by-round instructions are in the original Yarnspirations pattern, linked at the bottom. Here I’ll cover sizes, yarn, hook, gauge, and how each pumpkin is built, so you know what you’re getting into before buying yarn.
The three pumpkins
- Big pumpkin: about 8 inches (20.5 cm) wide and 6 inches (15 cm) tall, stem included.
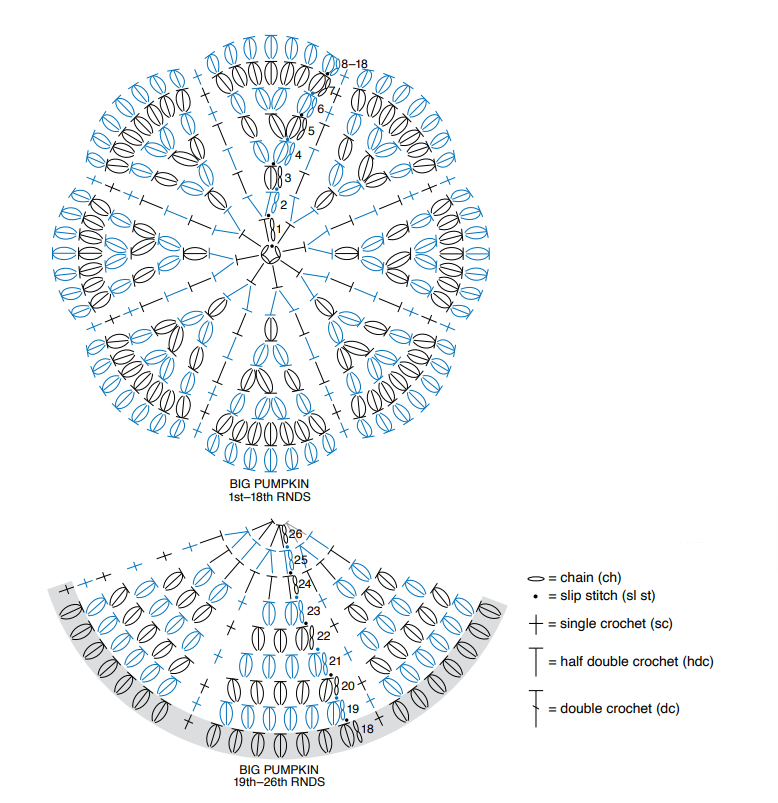
- Mini pumpkin 1: about 4 inches (10 cm) wide and 3 inches (7.5 cm) tall, including a curly-Q.
- Mini pumpkin 2: about 4 inches (10 cm) wide and 3½ inches (9 cm) tall, stem included.
What you’ll need
Yarn: Peaches & Crème (70.9 g / 2.5 oz, 109 m / 120 yds per ball)
- Bright Orange (main color): 2 balls
- Dark Taupe (contrast A): 1 ball
- Rosemary (contrast B): 1 ball
Hook: US G/6 (4 mm), or whatever size gets you to gauge
Also: yarn needle and fiberfill
Orange makes the pumpkin bodies. The other two colors are for the stems and the curly-Q.
Gauge
The pattern’s gauge is 14 single crochet and 15 rows = 4 inches (10 cm).
It’s tempting to skip a swatch on a small toy-sized project, but gauge decides how big your pumpkins turn out. Work tighter and they’ll come out smaller. Work looser and they’ll grow. A quick swatch first saves you from redoing a pumpkin later.
Skills you’ll use
The pattern is rated Easy, but it assumes you’re comfortable crocheting in rounds. You’ll work in joined rounds, increase and decrease, make puff stitches, work into the back loops, stuff the shape, close the last stitches, and sew small pieces on. The stitches are single crochet and half double crochet, plus the puff stitch for texture.
If you’ve never made a puff stitch, practice a few on scrap yarn first. It takes only a few minutes, and it’s much easier to learn on a swatch than in the middle of a pumpkin.
Abbreviations in the pattern: approx (approximately), beg (beginning), ch (chain), dc (double crochet), hdc (half double crochet), hdc2tog (half double crochet two together), puff st (puff stitch), rem (remaining), rep (repeat), rnd (round), RS (right side), sc (single crochet), sc2tog (single crochet two together), sl st (slip stitch), sp (space), st (stitch), tog (together), tr (treble crochet), yoh (yarn over hook).
How each pumpkin comes together
The big pumpkin is the centerpiece. It starts from a small ring, and you build upward in joined rounds. Increases give it its round shape, and the puff-stitch rounds add the texture. The middle section repeats that texture, then the upper rounds shrink the opening. You stuff it before closing the top, then crochet a separate stem and sew it on.
Mini pumpkin 1 is built the same way on a smaller scale. Its topper is a curly-Q in the green yarn. Working several stitches into each chain makes it coil on its own. You sew it on after the pumpkin is stuffed and closed.
Mini pumpkin 2 starts from the same construction as mini 1, with a few extra rounds that make it slightly taller. It gets a crocheted stem instead of a curly-Q, so the trio has two different mini styles that still match.
Tips for a neater pumpkin
- Stuff a little at a time. Add small pieces of fiberfill as you go so the shape stays even and smooth.
- Don’t overstuff. Too much filling stretches the stitches and can show through the puff texture.
- Keep your tension steady. The puff stitches are the main feature, and even tension from round to round keeps the surface looking uniform.
- Use a stitch marker. It’s easy to lose the start of a round when you’re working in the round, so mark it.
- Close the top firmly. Pull the last stitches tight and weave in the end so the pumpkin holds its shape.
Ways to display them
Set the big pumpkin beside the two minis on a shelf or coffee table, or tuck them in with your other fall and Halloween decorations. Since the pattern uses one main color and two contrast colors, you could also make a few sets in different color combinations. Three pumpkins of different sizes look more balanced together than one on its own.
Can a beginner make these?
The pattern is rated Easy, but you should already know the basic stitches and how to crochet in the round. The puff stitch is the one thing that may feel new, so practice it first. Once you have that down, the rest is repetition, which makes it a good first textured project.
Final thoughts
This is a friendly seasonal project. You get a big pumpkin and two minis, and along the way you practice puff stitches, shaping, stuffing, and finishing. For every round, stitch count, diagram, and finishing step, please use the original pattern.
Original pattern: Pumpkin Patch Crochet Pumpkins by Yarnspirations https://www.yarnspirations.com/products/peaches-creme-pumpkin-patch-crochet-pumpkins?variant=51554349875515
Video Tutorial
Explore more patterns