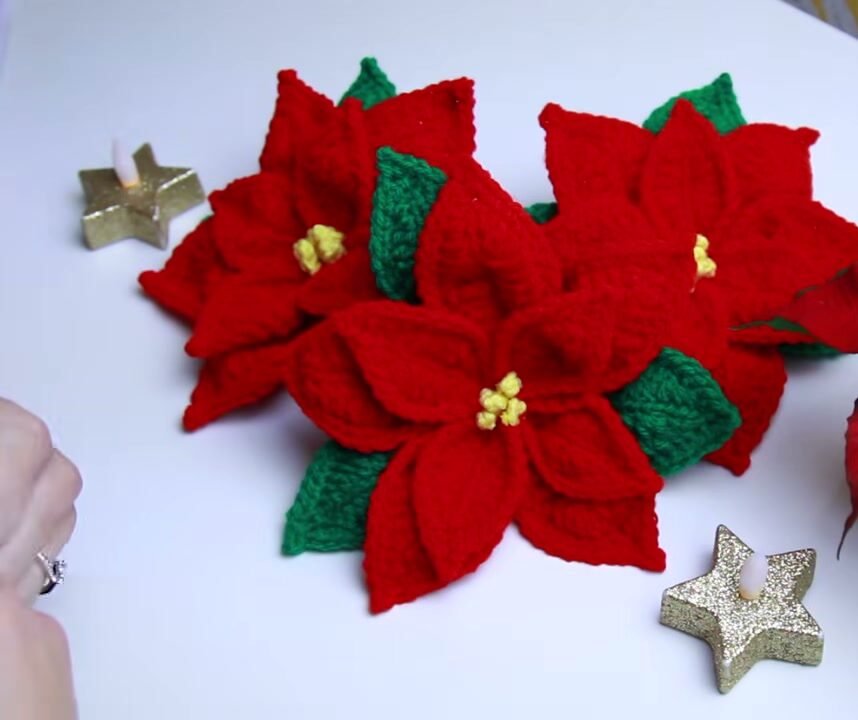
Few plants bring festive holiday cheer into a home quite like the bright red poinsettia flower. In this tutorial, I am going to teach you how to crochet a realistic, three-dimensional poinsettia bloom with wired petals and rich green leaves. Because each petal and leaf is edged with thin craft wire, you can shape, bend, and curl every single leaf into a lifelike botanical arrangement that keeps its form year after year. Below you will find both the complete step-by-step written pattern and the full video tutorial, so you can follow whichever format you prefer.
This post is based on the video tutorial by Brunaticality, linked below. Although this flower looks intricate and realistic, the design is made of simple individual pieces that come together easily. You will crochet four small inner petals, five large outer petals, and three leafy green accents, then twist their wire stems together into a stunning Christmas showpiece. Whether you want to tuck these flowers into your Christmas tree branches, arrange them in a decorative vase, craft holiday napkin rings, or place them along your festive dinner table, this pattern is a wonderful project to enjoy during the cozy winter season.
Table of Contents
What Will I Learn?
Working through this botanical flower pattern will introduce you to several fun and practical crochet techniques. In this project, you will practise:
- Working slip stitches along a foundation chain to construct a realistic central leaf rib
- Graduating stitch heights across a single petal using single crochet, half double crochet, double crochet, treble crochet, and quadruple crochet
- Crocheting around both sides of an exposed chain spine to build symmetrical oval petals
- Forming crisp, pointed petal tips with a delicate chain-3 picot stitch
- Crocheting over flexible floral wire along the perimeter so your flower can be sculpted into three dimensions
- Attaching contrast accent loops to build textured floral stamens
- Bundling and twisting wire stems into a secure, cohesive floral branch
Materials and Tools Here is the list of materials and tools I used to create these poinsettias:
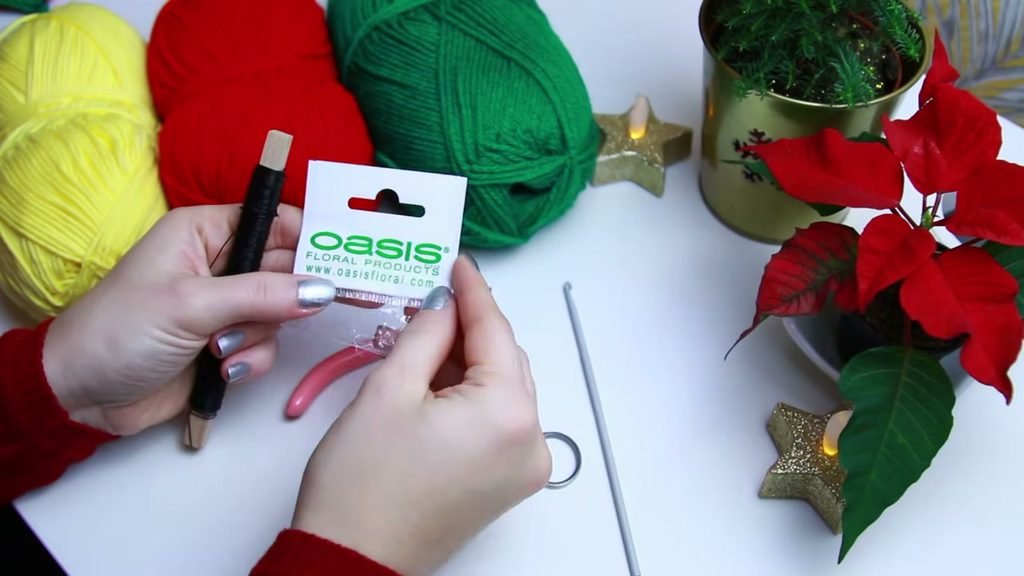
- Red Yarn: Hayfield Bonus DK (100% acrylic, 100 g), shade 0977 (Bright Red). You will need approximately 25 g to 30 g per flower for the 5 large petals and 4 small petals.
- Green Yarn: Hayfield Bonus DK (100% acrylic, 100 g), shade 0916 (Classic Green). You will need approximately 10 g to 15 g per flower for the 3 leaves.
- Yellow Yarn: Knit Craft Cotton Blend Plain DK (50% cotton, 50% acrylic, 100 g), shade Yellow. Only a few meters are needed to form the 4 small center stamens.
- Crochet Hook: 3.5 mm crochet hook (US size E/4). A slightly smaller hook than usual for DK yarn helps keep your stitches firm and conceals the wire neatly.
- Floral Craft Wire: Oasis black metallic wire stick (or flexible florist wire / paper-wrapped wire between 20 and 24 gauge). You will need one length of wire for each petal and leaf, roughly 12 to 14 inches (30 to 35 cm) per piece.
- Wire Cutters / Craft Pliers: For snipping and bending your wire stems safely without damaging your fabric scissors.
- Scissors: For cutting yarn strands cleanly.
- Yarn Needle / Tapestry Needle: For weaving in your beginning and ending tails at the base of each petal.
Please note that you can substitute any brand of DK, light worsted, or sport weight yarn from your stash. If you choose a heavier yarn such as Aran or worsted weight, pair it with a 4.0 mm or 4.5 mm hook; your finished poinsettia will simply turn out larger and fuller. If you select a lighter cotton thread or 4-ply yarn, use a 2.5 mm hook for a dainty miniature poinsettia suitable for handmade holiday greeting cards or brooches.
Finished Size and Gauge Each completed poinsettia flower measures approximately 6 to 7 inches (15 to 18 cm) in diameter from petal tip to petal tip when fully opened and shaped. Individual large petals and leaves measure approximately 3.5 inches (9 cm) in length, while the small inner petals measure approximately 2.5 inches (6.5 cm) in length.
Because this is a decorative flower and not a fitted garment, exact gauge is not critical for this pattern. What matters most is maintaining firm, even tension so your fabric remains sturdy enough to support the wire without gaps between stitches.
Pattern Notes and Abbreviations This pattern is written in standard US crochet terminology with US spelling throughout.
Pattern Components per Flower:
- 5 Large Petals (worked in Red yarn)
- 4 Small Petals (worked in Red yarn, with Yellow stamen loops attached)
- 3 Leaves (worked in Green yarn, identical in stitch count to the Large Petals)
Abbreviations
- ch: chain
- sl st: slip stitch
- sc: single crochet
- hdc: half double crochet
- dc: double crochet
- tr: treble crochet (yarn over twice, insert hook into stitch, yarn over and pull up a loop, [yarn over and pull through 2 loops] 3 times)
- quad: quadruple crochet / double treble (yarn over three times, insert hook into stitch, yarn over and pull up a loop, [yarn over and pull through 2 loops] 4 times)
- st(s): stitch(es)
- picot: ch 3, sl st into first chain
- rem: remaining
Construction Overview Each leaf and petal begins with a foundation chain. You will work slip stitches down the chain to build a raised center midrib, mirroring the natural spine found in botanical poinsettia leaves. Next, you will crochet graduated stitches outward along one side of the spine, make a picot at the tip, and crochet back down the opposite side.
Finally, you will lay a piece of craft wire along the outside edge and crochet a border of single crochet stitches encasing the wire completely. Leaving several inches of wire free at the base allows you to twist the pieces together into a sturdy central stem.
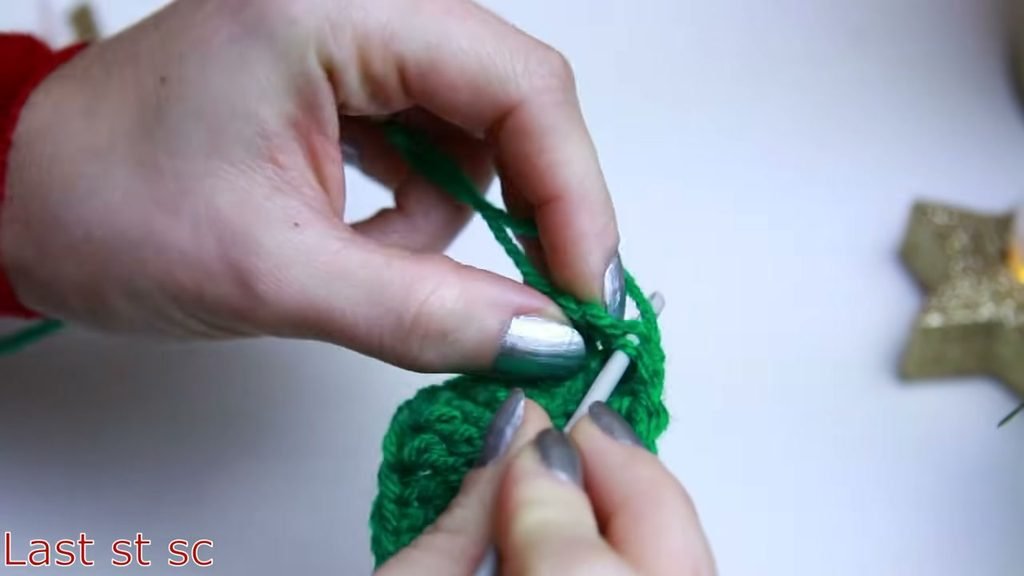
Large Petals and Leaves Pattern Make 5 in Red yarn for the large petals, and make 3 in Green yarn for the leaves. Both use the exact same stitch sequence.
- Center Midrib Spine Make a slip knot on your hook, leaving a 4-inch yarn tail. Step 1: Ch 13. Step 2: Skip the first chain from the hook. Work 1 sl st into the second chain and into each remaining chain down the foundation row. You will have 12 slip stitches along the spine. Step 3: In the very last stitch (the 12th slip stitch, right next to your starting slip knot), work 3 sc into that same stitch. This rounds the base and turns your work so you can crochet along the first side. (3 sc)
- First Side of Petal Now work along the edge of the slip stitch midrib, inserting your hook into the remaining loop of each chain: Step 4: Work 1 hdc in the next stitch. Step 5: Work 1 dc in the next stitch. Step 6: Work 1 tr in each of the next 2 stitches. To make a treble crochet, yarn over twice, insert hook, pull up a loop, then yarn over and draw through two loops three times. Step 7: Work 1 quad (quadruple crochet) in each of the next 2 stitches. To make a quadruple crochet, yarn over three times, insert hook, pull up a loop, then yarn over and draw through two loops four times. Step 8: Work 1 tr in each of the next 2 stitches. Step 9: Work 1 dc in each of the next 2 stitches. Step 10: Work 1 hdc in the next stitch. Step 11: Work 1 sc in the last stitch at the top.
- Pointed Tip Picot Step 12: Ch 3. Work 1 sl st into the back loop or first chain of that chain-3 to form the pointed picot tip.
- Second Side of Petal Turn your work to crochet back down the opposite edge toward the base: Step 13: Work 1 sc in the first stitch on the second side. Step 14: Work 1 hdc in the next stitch. Step 15: Work 1 dc in each of the next 2 stitches. Step 16: Work 1 tr in each of the next 2 stitches. Step 17: Work 1 quad in each of the next 2 stitches. Step 18: Work 1 tr in each of the next 2 stitches. Step 19: Work 1 dc in the next stitch. Step 20: Work 1 hdc in the next stitch. Step 21: Work 1 sc in the last stitch at the base. Step 22: Work 1 sl st into the base to align your hook for the wire border.
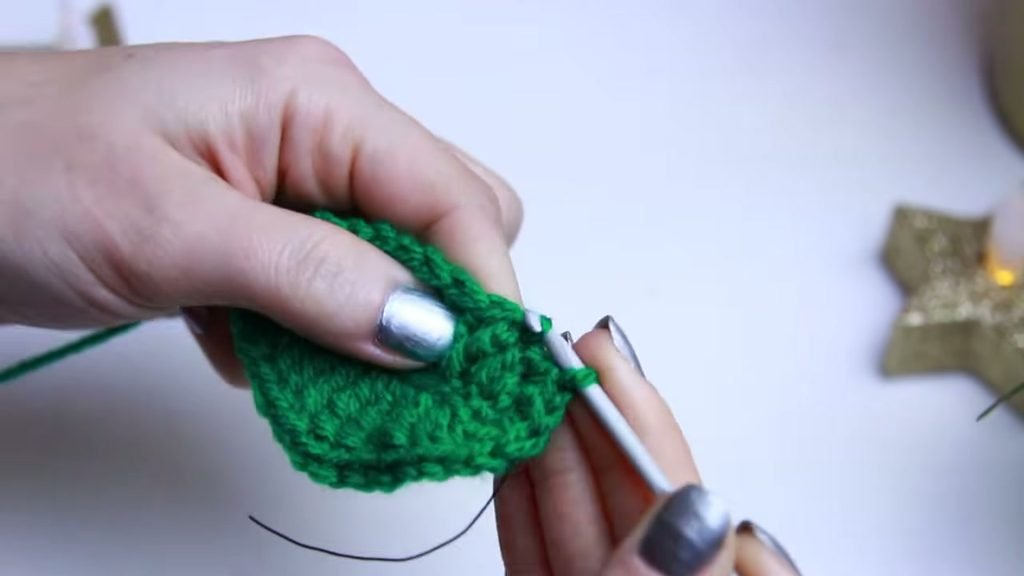
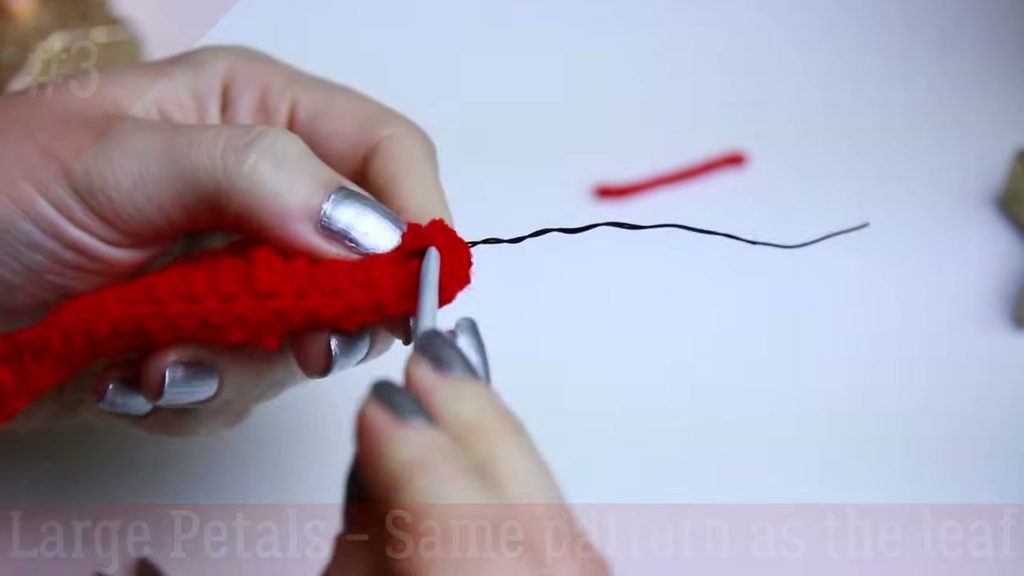
- Adding the Floral Wire Border Step 23: Take a piece of floral wire (around 12 to 14 inches long). Lay the wire along the edge of your petal directly behind your hook, leaving about 3 to 4 inches of wire extending past the bottom base. Step 24: Hold the wire in place against the fabric with your thumb and index finger. Work 1 sc into each stitch up the first side, capturing the wire completely inside each stitch. Step 25: When you reach the top picot point, work 1 sc into the ch-3 space, 1 sc into the center chain at the tip, ch 3, and sl st into the first chain to recreate a sharp wired picot point. Step 26: Continue working 1 sc into each stitch down the second side, trapping the wire inside every stitch until you reach the base. Step 27: Ch 1, cut your yarn leaving a 4-inch tail, and pull the loop through to fasten off.
- Shaping and Securing the Base Step 28: Snip the wire, leaving 3 to 4 inches of wire extending at the bottom. Step 29: Fold the petal in half lengthwise along the central midrib. Firmly twist the two extending wire ends together right at the base of the petal, then bend the twisted wire stem downward. Step 30: Thread your yarn tail onto a tapestry needle, weave it securely into the back of the petal base, and trim any remaining yarn tail. Set the completed piece aside. Repeat these instructions until you have 5 large red petals and 3 green leaves.
Small Petals Pattern
Make 4 in Red yarn for the center layer of the poinsettia flower.
- Center Midrib Spine Make a slip knot on your hook, leaving a 4-inch yarn tail. Step 1: Ch 9. Step 2: Skip the first chain from the hook. Work 1 sl st into the second chain and into each remaining chain down the row. You will have 8 slip stitches along the spine. Step 3: In the last stitch (the 8th slip stitch nearest your starting slip knot), work 3 sc into the same stitch to turn the corner. (3 sc)
- First Side of Small Petal Step 4: Work 1 hdc in the next stitch. Step 5: Work 1 dc in the next stitch. Step 6: Work 1 tr in each of the next 2 stitches. Step 7: Work 1 dc in each of the next 2 stitches. Step 8: Work 1 hdc in the next stitch. Step 9: Work 1 sc in the last stitch at the top.
- Pointed Tip Picot Step 10: Ch 3. Work 1 sl st into the first chain to form the pointed tip.
- Second Side of Small Petal Step 11: Work 1 sc in the first stitch on the second side. Step 12: Work 1 hdc in the next stitch. Step 13: Work 1 dc in each of the next 2 stitches. Step 14: Work 1 tr in each of the next 2 stitches. Step 15: Work 1 dc in the next stitch. Step 16: Work 1 hdc in the next stitch. Step 17: Work 1 sc in the last stitch at the base. Step 18: Work 1 sl st at the base to finish the fabric round.
- Adding the Floral Wire Border Step 19: Place your craft wire along the outside edge behind your hook, leaving 3 to 4 inches extending past the base. Step 20: Work 1 sc in each stitch up the first side encasing the wire. Step 21: At the tip, work 1 sc into the space, ch 3, and sl st in the first chain over the wire. Step 22: Work 1 sc in each stitch down the second side over the wire. Step 23: Ch 1, cut yarn, and fasten off. Cut wire leaving a 3 to 4-inch tail. Fold the petal along the center midrib, twist the wire ends firmly together at the base, and weave in your yarn ends. Repeat these steps until you have completed all 4 small red petals.
Yellow Center Pistils
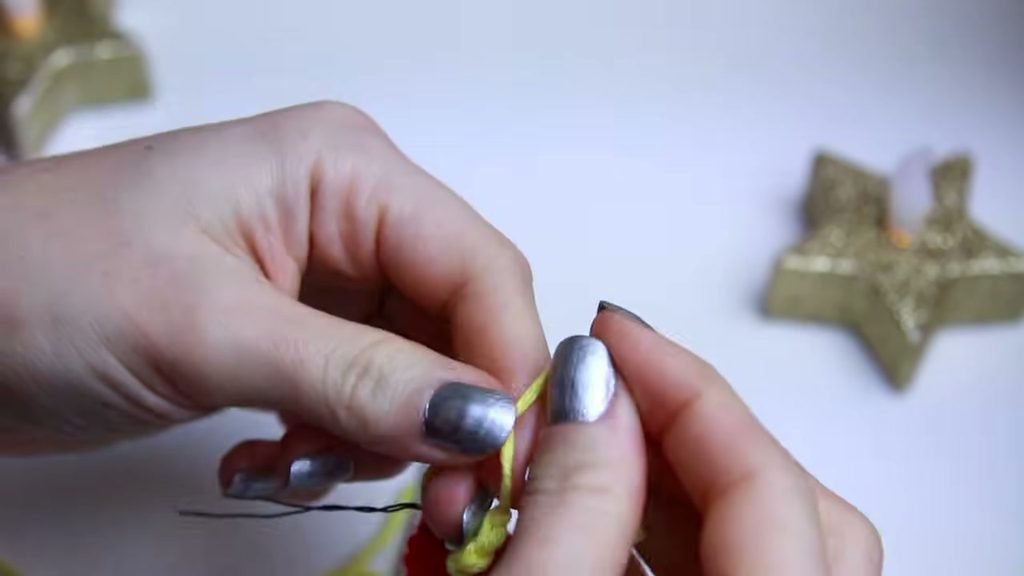
Real poinsettia flowers feature small yellow clusters in their center called cyathia. You will add this realistic detail directly onto each of the 4 small red petals using your yellow yarn.
Step 1: Hold one of your small red petals with the right side facing outward. Step 2: Create a slip knot with your yellow yarn. Insert your hook into a red stitch near the lower base of the petal, just above where the wire stems twist together. Step 3: Pull through to join with a sl st. Step 4: Ch 5. Step 5: Slip stitch back into your very first yellow chain. This creates a tiny, raised yellow loop representing the stamen. Step 6: Ch 1, cut your yellow yarn leaving short tails, and pull through to fasten off. Step 7: Tie the two yellow yarn tails together into a firm, tight double knot against the petal fabric, then snip the tails close to the knot. A tiny dab of fabric glue can be added to the knot for extra durability if desired. Repeat this process on all 4 small petals.
Assembling the Poinsettia Now that all twelve pieces are ready (4 small petals with yellow centers, 5 large red petals, and 3 green leaves), it is time to assemble and sculpt your three-dimensional flower.
Step 1: Preparing the Pieces Gently open out the folded petals and leaves so they lie slightly flat. Straighten the twisted wire tails extending from the base of each piece so they are parallel and ready to be bundled.
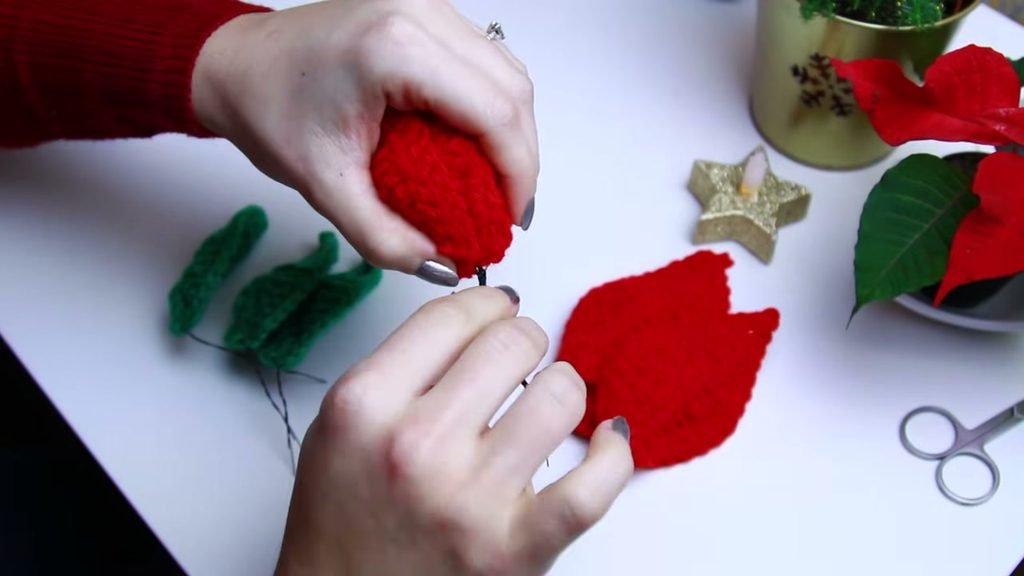
Step 2: Assembling the Inner Center Take two of your small red petals with yellow stamens. Place their bases together and twist their wire stems around each other tightly. Add the third small petal and twist its wire into the bundle. Add the fourth small petal and twist again. You will now have a neat cluster of four petals with four bright yellow stamens clustered closely in the middle.
Step 3: Adding the Large Outer Petals Take your five large red petals. Position the first large petal just behind the inner cluster, nesting it into one of the gaps between two small petals. Twist its wire stem firmly around the central wire bundle. Continue adding the remaining four large petals one by one around the flower, spacing them evenly in a circle and staggering them behind the inner layer. Twist all the wire tails together down the stem as you work.
Step 4: Adding the Green Leaves Position the three green leaves on the underside of the flower. Space them evenly around the circumference so they emerge naturally from beneath the large red petals. Wrap the leaf wires around the main stem bundle, binding all twelve wire strands into one solid stem.
Step 5: Finishing the Stem Once all wires are twisted together, you can fold the bottom end of the wire bundle back up by about half an inch and pinch it flat with craft pliers to cover sharp wire ends. If you plan to place your poinsettia in a vase or bouquet, you can wrap green floral tape around the entire twisted wire stem for a tidy finish.
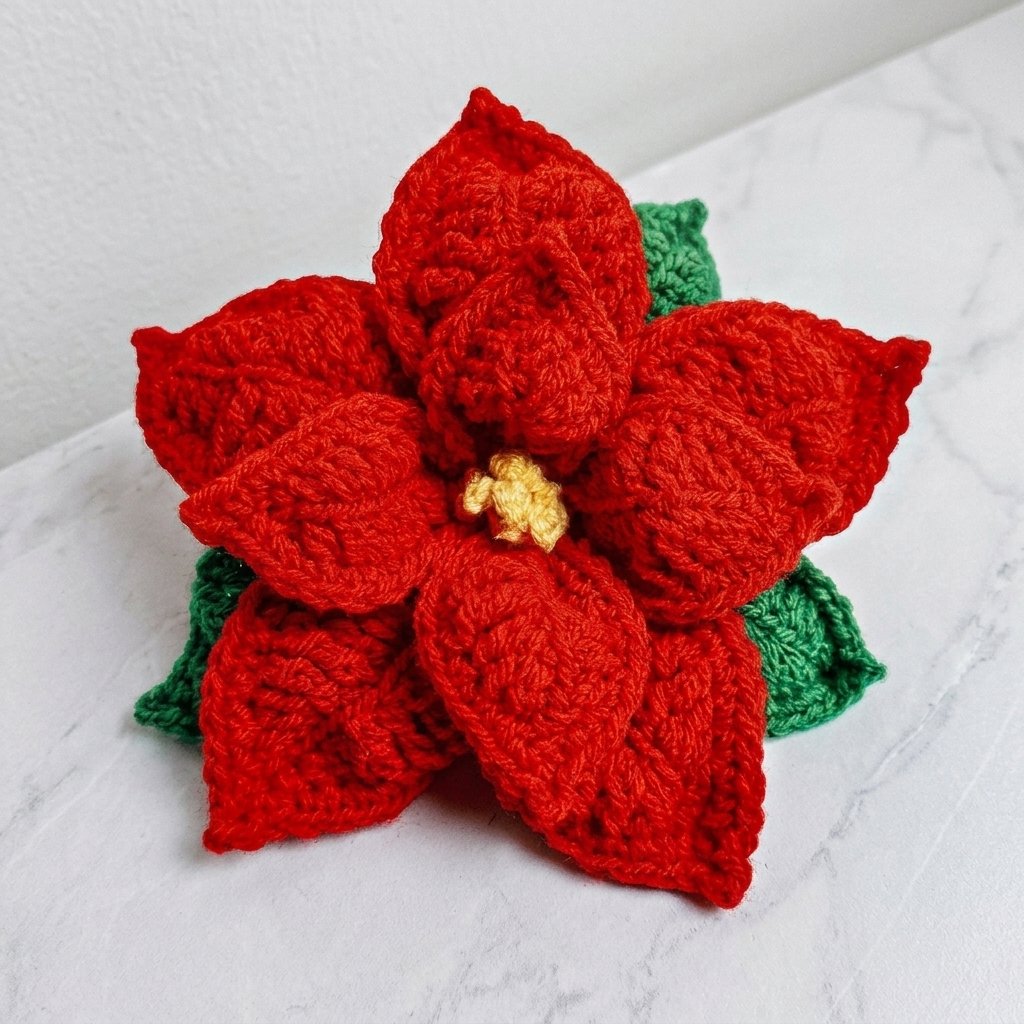
Step 6: Sculpting the Bloom Now comes the most satisfying part of the project: shaping your flower! Hold the base firmly and press upward into the center of the bloom. Using your fingers, cup each petal slightly along its central spine, curl the pointed picot tips downward or upward, and ruffle the wired outer edges. Adjust the green leaves so they frame the red petals beautifully.
Video Tutorial If you prefer to follow along visually and watch each stitch in action, you can view the complete step-by-step video tutorial right here:
Tips and Common Mistakes
- Keep your slip stitch spine loose: When working the initial 12 slip stitches for the large petals (or 8 for the small petals), keep your tension relaxed. If your slip stitches are too tight, inserting your hook into the remaining loops for the graduated side stitches will be difficult.
- Leave enough wire tail at the base: Always ensure you have at least 3 to 4 inches (8 to 10 cm) of wire extending past the bottom of each petal before beginning your border. If the wire tail is too short, you will not have enough wire to twist your pieces into a stable stem.
- Smooth out the wire as you crochet: Florist wire can bend and wiggle while you work around it. Simply smooth the wire flat against your stitches with your non-dominant hand as you crochet your single crochet border.
- Count your stitches symmetrically: Both sides of the petal should match in stitch sequence and count. Counting your stitches before fastening off ensures your petals remain beautifully balanced.
- Do not cut your wire with fabric scissors: Always use craft pliers or dedicated wire cutters to trim craft wire, as cutting wire with fabric shears will quickly dull your blades.
Make More
- Crochet Beanie Pattern : https://cozyknotty.com/crochet-beanie-pattern/
- Crochet Cardigan Pattern : https://cozyknotty.com/crochet-cardigan-pattern/
- Crochet daisy granny square : https://cozyknotty.com/daisy-granny-square/
Frequently Asked Questions
What kind of wire should I use for crocheting around petals? A thin, flexible craft wire or florist wire between 20 and 24 gauge works best for this project. The Oasis metallic wire stick used in the video is flexible enough to bend easily around curves while remaining sturdy enough to hold the sculpted shape of the petals.
Can I make this poinsettia without wire? Yes, you can crochet this pattern without wire by simply working the single crochet border directly into the stitches. However, without the wire support, the petals will lay flat like an appliqué rather than holding a realistic three-dimensional, sculpted shape.
What can I use these crochet poinsettias for? These flowers are remarkably versatile for holiday decorating. You can place them in a small vase as a tabletop centerpiece, wire them into Christmas tree branches or holiday wreaths, string several together into a festive garland, or attach a pin back to wear one on a winter coat.
Can I make this poinsettia in other colors? Poinsettias look gorgeous in a variety of holiday shades. In addition to traditional festive red, you can crochet the petals in creamy winter white, soft blush pink, rich burgundy, or even a deep holiday plum with golden yellow centers.
I would love to see how your finished crochet poinsettia flowers turn out, so please share your photos in the comments below or tag me in your holiday makes. Happy crocheting