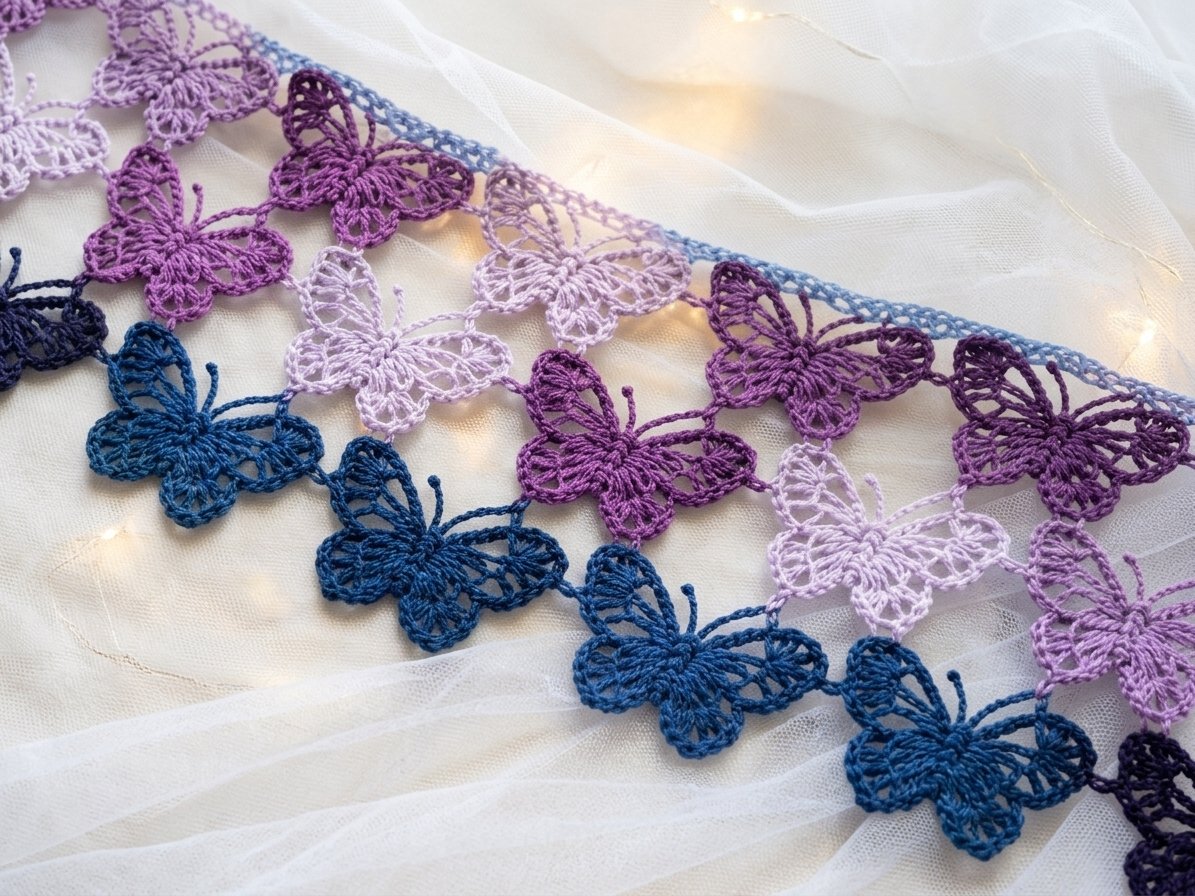
Few crochet motifs capture the grace and joy of handmade craft quite like a three-dimensional lace butterfly. With delicate openwork wings, scalloped outer edges, a cinched center waist, and charming slender antennae, this crochet butterfly makes a versatile accent for blankets, garments, hair clips, and home decor. Whether you create a single butterfly as a sweet standalone applique or connect a series of them into a continuous lace blanket or table runner, this project comes together surprisingly quickly using simple thread or yarn.
The beauty of this design lies in its clever construction: you crochet two identical lace wing panels featuring tall stitches that radiate outward from a central chain foundation, add a neat ribbed body cord with perky antennae, and seam the parts together to form a sculptural 3D shape. In this tutorial, I guide you step by step through every row, stitch count, shaping cuTable of Contentrve, and assembly technique. This post is based on the video tutorial by crochet tutorial channel, linked below.
Table of Contents
What Will I Learn?
By following this comprehensive tutorial, you will master several key lace crochet and shaping skills:
- How to work tall double treble crochet stitches to create airy, radiating openwork wing veins.
- How to sculpt asymmetric upper and lower wing lobes within a single continuous motif.
- How to work delicate shell clusters and chain loops along the wing borders to produce graceful scalloped edges.
- How to crochet tidy corded antennae using a simple chain-and-single-crochet technique.
- How to assemble and cinch flat crocheted panels into a dimensional 3D butterfly using a tapestry needle.
- How to join multiple butterfly motifs wingtip-to-wingtip to create heirloom blankets, curtain trims, or lace garlands.
Materials and Tools
Because this motif requires very little yarn, it is an ideal scrap-busting project. Below are the recommended supplies:
- Yarn: Sport weight or light DK weight yarn (approximately 15 to 20 yards per butterfly). Cotton, bamboo, or smooth acrylic blends provide excellent stitch definition and hold their openwork lace shape crisply. You can also use fingering weight crochet thread (such as size 3 or size 10 thread) for miniature jewelry appliques.
- Crochet Hook: 3.5 mm (US E/4) crochet hook. If you use fine crochet thread, downsize to a 1.75 mm to 2.25 mm hook.
- Tapestry Needle: A blunt yarn needle for seaming the wings together, wrapping the body, and securing yarn ends.
- Scissors: For trimming yarn tails.
- Blocking Mat and Pins (Optional): Useful if you want to gently steam or wet block your wings for maximum symmetry and flat edges.
Finished Size and Gauge
Using the recommended 3.5 mm hook and light DK cotton-acrylic yarn, a single finished butterfly measures approximately 8 cm wide by 7 cm tall (about 3.1 inches wide by 2.75 inches tall) across its widest wing span.
Precise gauge is not critical for this decorative applique. The most important factor is keeping your stitch tension even so that both wings match in size and your tall stitches remain crisp and open rather than loose or floppy.
Pattern Notes
- Crochet Terminology: Written in standard US crochet terms.
- Wing Construction: Each butterfly is composed of two identical wing halves (Wing 1 and Wing 2). Each wing begins with a foundation chain, followed by three rows that build the inner veins, the body of the wings, and the scalloped border.
- Working into a Single Chain Point: In Row 1, five tall stitches are worked into the exact same foundation chain stitch. This creates a focal hub from which the wing arches fan outward.
- Double Treble Crochet (dtr): Yarn over 3 times before inserting the hook into the chain, then [yarn over and pull through 2 loops] 4 times. This creates a tall, graceful post.
- Treble Crochet (tr): Yarn over 2 times before inserting the hook, then [yarn over and pull through 2 loops] 3 times.
Terms and Abbreviations
- ch: chain
- sc: single crochet
- hdc: half double crochet
- dc: double crochet
- tr: treble crochet (yarn over 2 times)
- dtr: double treble crochet (yarn over 3 times)
- sl st: slip stitch
- sp: space
- st(s): stitch(es)
- rep: repeat
Butterfly Wing Pattern
You will crochet two identical wing pieces using your 3.5 mm hook. Each wing incorporates both the upper larger blade and the lower smaller lobe.
Foundation and Row 1 (Radiating Veins)
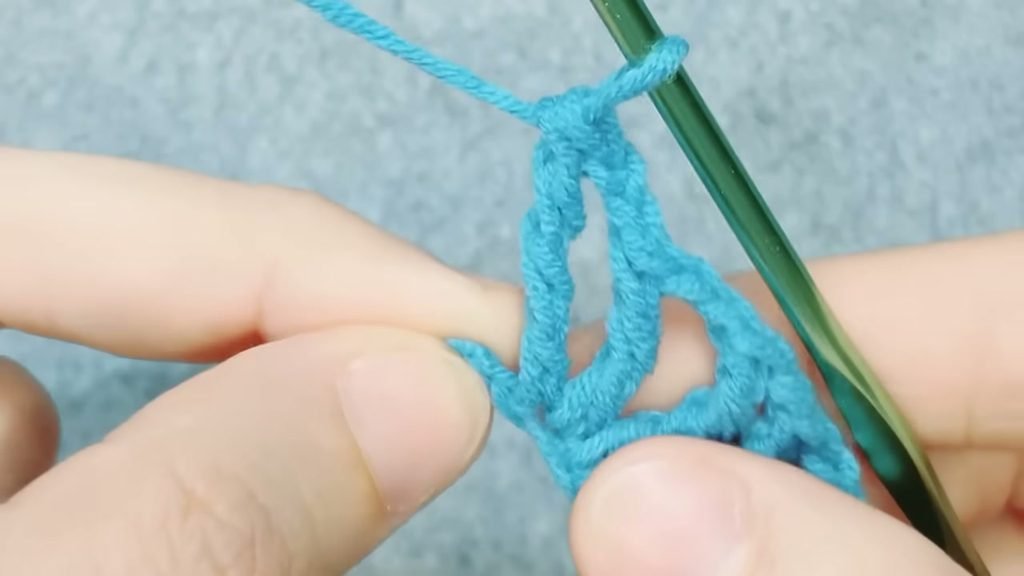
Foundation: Start with a slip knot on your hook and work 11 chains loosely.
Row 1: Count back to the 8th chain from your hook (leaving exactly 3 unworked foundation chains right next to the initial slip knot). Yarn over 3 times to prepare a double treble crochet:
- Work 1 dtr into the 8th chain from the hook.
- Ch 1, then work 1 dtr into the same foundation chain.
- Ch 1, then work 1 dtr into the same foundation chain.
- Ch 2, then work 1 tr (yarn over twice) into the same foundation chain.
- Ch 2, then work 1 dtr into the same foundation chain.
You now have 6 radiating spokes (the initial turning chain which counts as a dtr plus ch-2, followed by three dtr stitches, one tr, and one final dtr). This creates 5 distinct chain spaces radiating from the center hub: three upper spaces and two lower spaces.
Row 2 (Sculpting the Wing Blades)
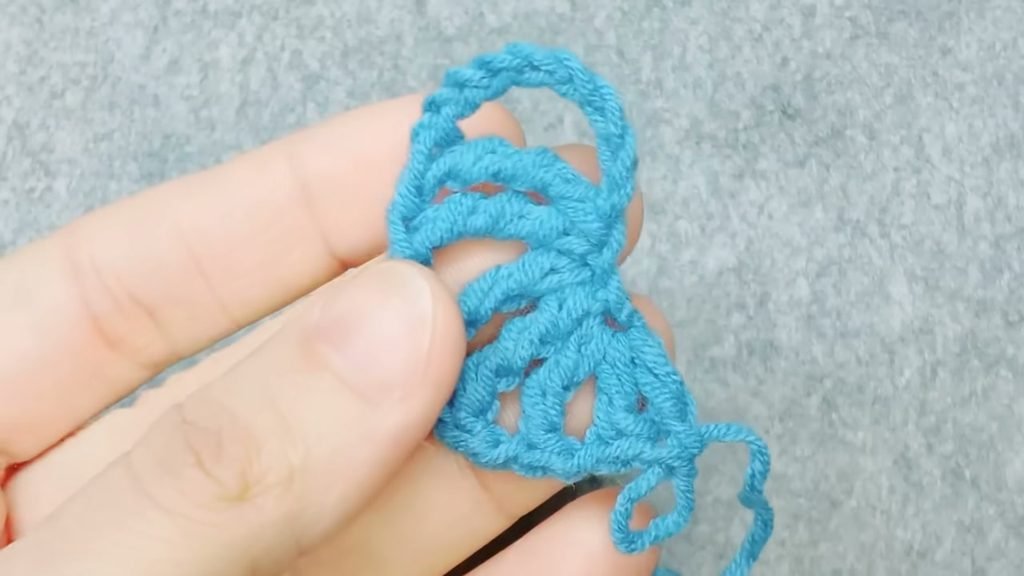
Row 2: Ch 1 and turn your work to crochet back across the five open spaces created in Row 1:
- Space 1 (Upper Outer Space): Work [1 tr, ch 1, 2 dc] directly into the first chain space.
- Space 2 (Upper Middle Space): Work [1 tr, ch 1, 2 dc] directly into the second chain space.
- Space 3 (Center Transition Space): Work 2 hdc into the third chain space to form the gentle dip between the upper and lower wing.
- Space 4 (Lower Middle Space): Work 1 dc into the fourth chain space.
- Space 5 (Lower Outer Arch): Work [1 dc, ch 1, 1 dc, ch 1, 1 dc] into the final chain-2 space.
Turn your work. Notice how the upper wing already looks full and elevated, while the lower wing tapers smoothly toward the bottom base.
Row 3 (Scalloped Edging and Wing Peaks)
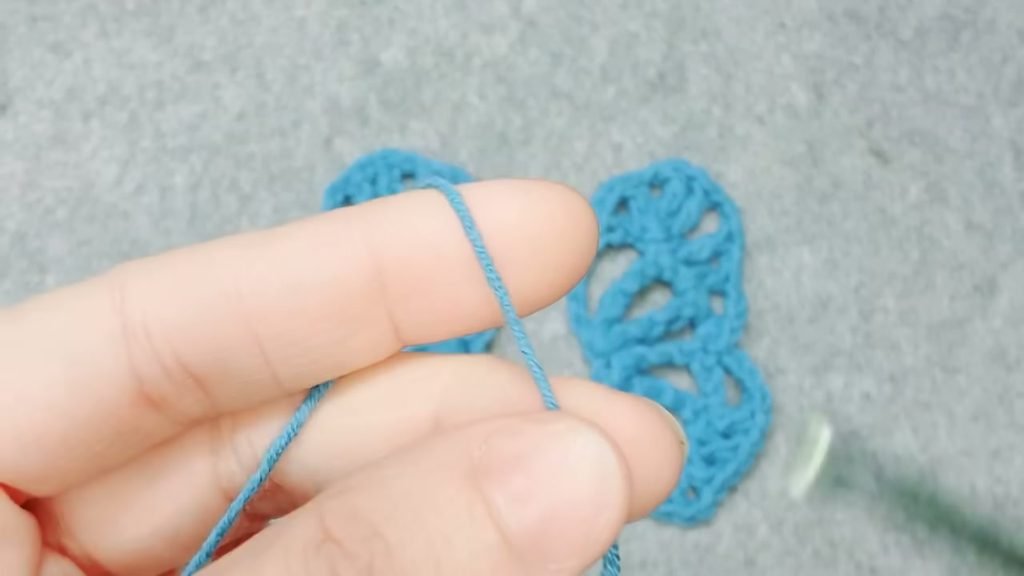
Row 3: Ch 3 and turn. In this row, you travel around the outer edge of the wing to add delicate scallops and define the upper wing tip:
- Work 1 sc into the first ch-1 space of the lower wing, ch 3, then work 1 sc into the next ch-1 space.
- Ch 2, skip the dc stitches, and work 1 dc into the center hdc valley between the wings.
- Ch 1, skip to the next space on the upper wing, and work 1 tr into the space between stitches, followed by ch 2.
- Into the peak shell space (the ch-1 space of the first upper shell), work [1 tr, ch 1, 1 tr, 1 dc] to form a distinct pointed wing tip.
- Ch 2, work 1 dc into the next space, ch 3, and slip stitch into the foundation base of the wing to anchor the yarn securely.
Fasten off. On your first wing, cut a short tail and weave it in. On your second wing, leave a 25 cm (10-inch) yarn tail for seaming the two wings together during assembly.
Central Body and Antennae
The central butterfly body consists of two small parts: a straight cord that wraps around the waist to cinch the wings, and a pair of corded antennae that rise above the head.
Part 1: The Body Band (Waist Cinch)
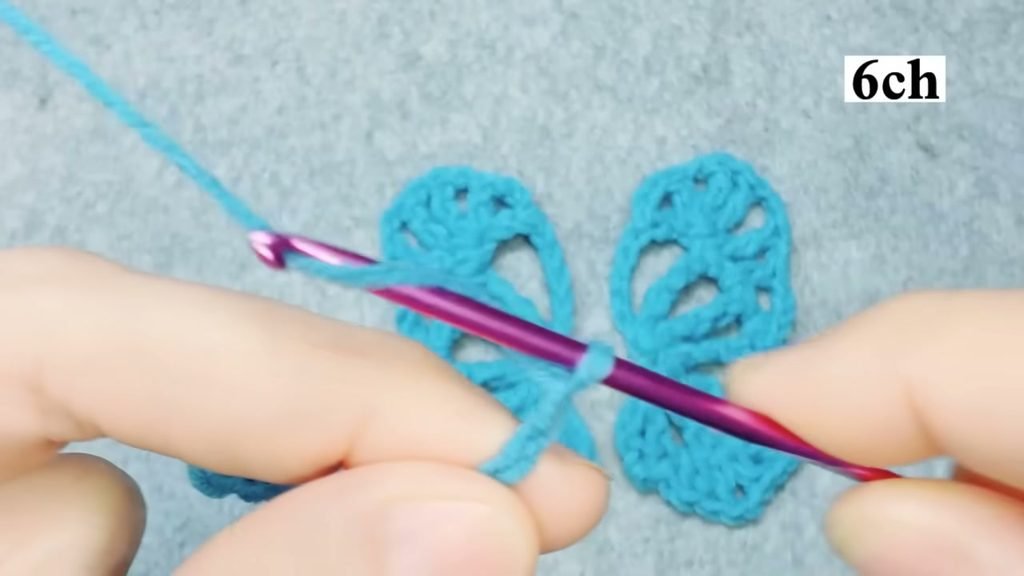
Using your 3.5 mm hook and the same yarn, work a simple chain band:
- Make a slip knot and chain 12.
- Fasten off, leaving a 15 cm (6-inch) tail on both ends for sewing.
This 12-chain cord will wrap snugly around the center waist of the combined wings, drawing them into a lifelike dimensional shape.
Part 2: The Dual Antennae
Work both antennae as one continuous piece without breaking your yarn:
- Start with a slip knot and chain 6.
- Beginning in the 2nd chain from your hook, work 1 sc in each of the 5 remaining chains back down the strand (5 sc). Your first antenna is complete.
- Do not fasten off. Immediately chain 6 for the second antenna.
- Beginning in the 2nd chain from your hook, work 1 sc in each of the 5 chains down (5 sc).
- Slip stitch into the foundation base where both antennae meet to lock them together.
- Fasten off, leaving a 15 cm (6-inch) tail for stitching to the butterfly head.
Assembling the 3D Butterfly
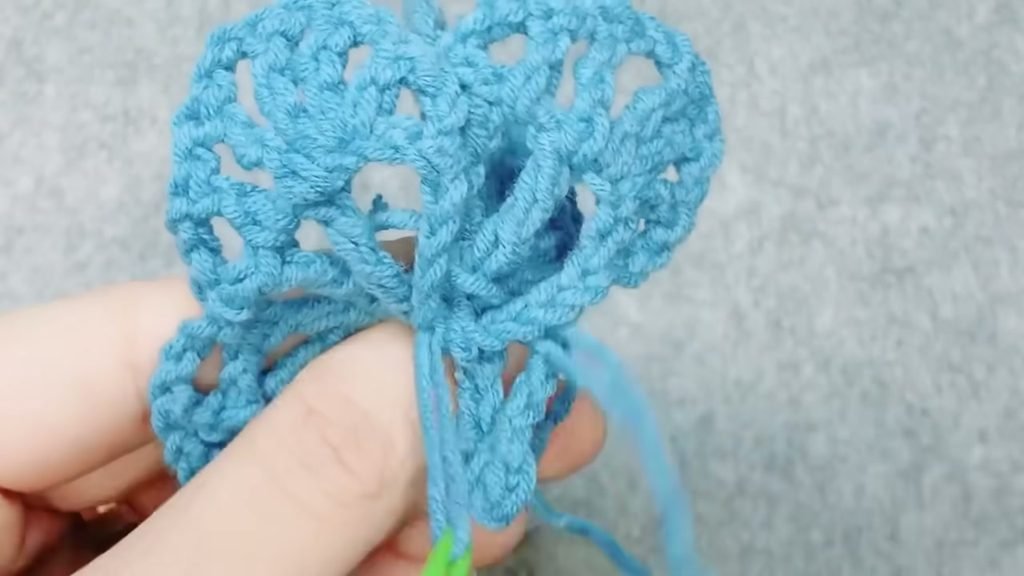
Now that all individual pieces are crocheted, you bring the butterfly to life through three simple assembly steps:
- Join the Wings: Place Wing 1 and Wing 2 side by side on a flat surface with their straight foundation edges touching and both right sides facing upward. Thread the long tail from the second wing onto your tapestry needle. Using an invisible whipstitch, sew the two wings together along their straight inner edges from top to bottom. Pull the stitches firm so the seam sits flat and secure.
- Wrap the Body Cinch: Position the 12-chain cord vertically across the center of your seamed wings, centering it right over the waist dip between the upper and lower lobes. Wrap the cord around the back of the butterfly, pulling both ends snug so the center of the butterfly pinches gently inward, causing the lace wings to flare upward. Sew the two ends of the cord together securely on the backside using your needle, then weave the yarn tails into the back.
- Attach the Antennae: Position the base of your crocheted antennae at the top center of the butterfly, right above the wrapped body band. Sew the base firmly into the seam stitches on the backside. Shape the two antennae with your fingers so they splay outward at a perky, natural angle.
- Weave in Ends: Turn the butterfly to the back, knot any loose tails together neatly, and thread them through the dense stitches of the central body wrap before trimming excess yarn.
Joining Butterflies for Blankets and Borders
While a single butterfly makes a charming embellishment for a sun hat, cardigan, or baby headband, you can also join multiple motifs together to produce a breathtaking openwork fabric. Here is how to create continuous rows or heirloom blankets:
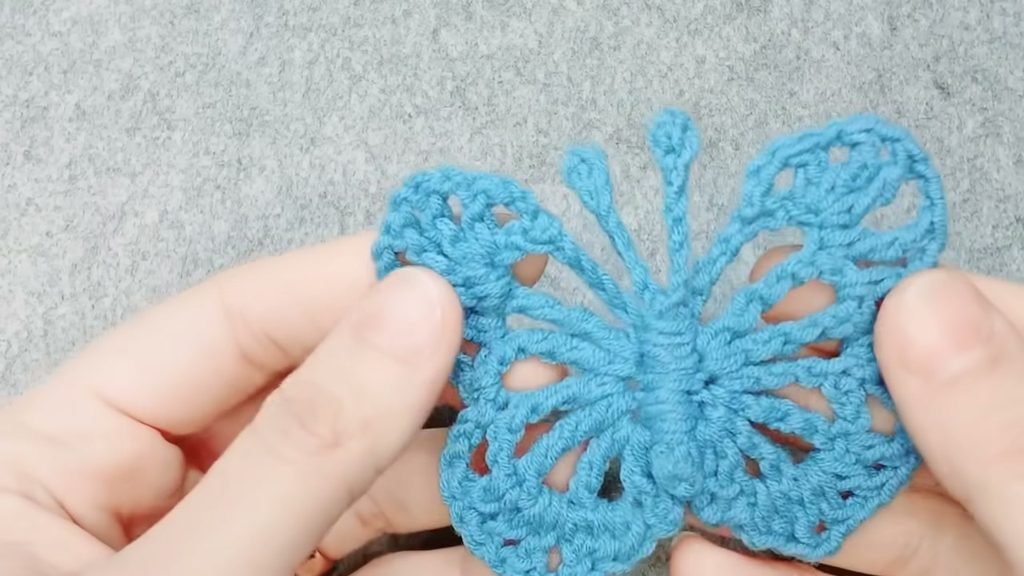
- Wingtip Joining (As Shown in the Video Thumbnail): Lay your finished butterflies in horizontal rows. Connect adjacent butterflies at two key contact points: where the upper wing peaks meet and where the lower wing curves touch. Join them either by slip stitching through both outer chain loops with your hook or by taking two small hand stitches with a tapestry needle.
- Gradient Strip Blankets: Crochet butterflies in ombre color bands, transitioning from deep teal and ocean blue to sage green, pale mint, and antique cream. Connect the rows into wide panels, then work a simple single crochet and picot border around the perimeter for a show-stopping baby blanket.
- Curtain Valances and Table Runners: Join two or three rows of butterflies side-by-side to create a whimsical lace runner that drapes beautifully over a dining table or across a sunny nursery window.
Pattern Summary Table
| Component | Stitch Count / Dimensions | Key Techniques |
|---|---|---|
| Wing Foundation (Make 2) | Ch 11 | Loose tension; 8th ch from hook forms central hub |
| Wing: Row 1 | 6 spokes, 5 chain spaces | 5 dtr and 1 tr radiating from a single chain point |
| Wing: Row 2 | Upper shells, center hdc, lower dc | [1 tr, ch 1, 2 dc] shells on top; gentle dip at waist |
| Wing: Row 3 | Scalloped border and peak | Ch-3 loops along lower wing, [1 tr, ch 1, 1 tr, 1 dc] peak shell |
| Body Band | Ch 12 cord | Wraps vertically around waist to cinch 3D wing flare |
| Antennae Piece | Two 5-sc stems | [Ch 6, 5 sc down] worked twice from a single base slip knot |
| Finished Motif | 8 cm wide x 7 cm tall | Seamed along spine, wrapped at center, antennae anchored |
Video Tutorial
Watch every row, shell cluster, and needle assembly technique demonstrated step-by-step in the official video tutorial: Beautiful crocheted butterflies, crocheted step by step by crochet tutorial channel.
Tips and Common Mistakes
- Do Not Pull Double Trebles Too Tight: When working double treble stitches in Row 1, keep your yarn overs relaxed on the shaft of the hook. If your tension is too tight, the tall posts will bow inward and distort the open lace arches.
- Work All Row 1 Stitches into One Chain: Be careful not to split adjacent foundation chains. Five full stitches plus the turning chain must enter the exact same chain loop so that all wing veins radiate symmetrically.
- Leave Adequate Seaming Tails: It is always easier to trim excess yarn than to join a new strand during assembly. Leave at least 20 to 25 cm of tail on the second wing and on the body cord.
- Gentle Steam Blocking: If your cotton or acrylic wings tend to curl along the scalloped edges before assembly, pin them flat on a foam mat and hover a steam iron 3 cm above the fabric for a few seconds. Allow them to cool completely before stitching the pieces together.
- Tuck Antenna Tails Invisibly: When securing the antennae, knot the tail firmly inside the wrapped body band where it will remain completely concealed from the front.
Make More / Related Patterns
If you enjoyed crafting this delicate lace butterfly, explore these related free crochet patterns from our library:
- Crochet Hat Pattern –> https://crochetpattern.us/crochet-hat-pattern/
- Crochet Shawl Pattern –> https://crochetpattern.us/crochet-shawl-pattern/
- Crochet Hat Patterns: Free Adult Bucket Hat —> https://crochetpattern.us/crochet-hat-patterns-adult-bucket-hat/
Frequently Asked Questions
Can I make smaller or larger butterflies?
Yes, you can easily change the finished size by adjusting your yarn weight and hook size. Using fine size 10 crochet thread and a 1.75 mm hook produces delicate 3 cm butterfly charms for earrings or hairpins. Using worsted weight blanket yarn and a 5.0 mm hook yields a large 14 cm statement butterfly cushion motif.
How do I make my crochet butterfly wings stiffer?
If you plan to use your butterflies as standalone ornaments, hair accessories, or framed wall art, mix equal parts water and white craft glue (or use a commercial fabric stiffener spray), brush it lightly over the wrong side of the blocked wings, and allow it to dry completely overnight.
Can I make the butterfly in multiple colors?
Yes, you can change yarn colors between Row 1, Row 2, and the Row 3 scalloped border to create gorgeous multi-tonal wings. You can also crochet the central body band and antennae in a contrasting dark chocolate or black yarn to highlight the butterfly body.
How do I attach this butterfly applique to a blanket or garment?
Lay the butterfly right-side up on your project. Use a tapestry needle with matching yarn to catch the stitches along the central body seam and the lower wing bases, leaving the upper wing tips free so they maintain their lovely three-dimensional lift.
I would love to see your finished butterflies and how you choose to use them in your projects, so please share your photos in the comments below. Happy crocheting, Meryem!